This Year’s Herbs

Happy Monday, friends! My head is still spinning a bit from a whirlwind weekend in Chicago. Are any of you from there? I wish I could say I had more time to explore the city, but my time was pretty work focused. It was fun work, though! I’m hoping to share more on that in this week’s Biz Notes.

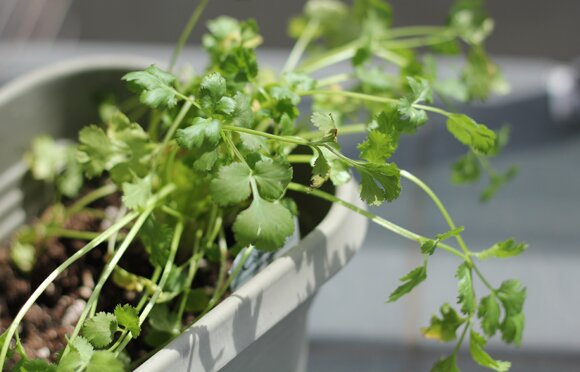
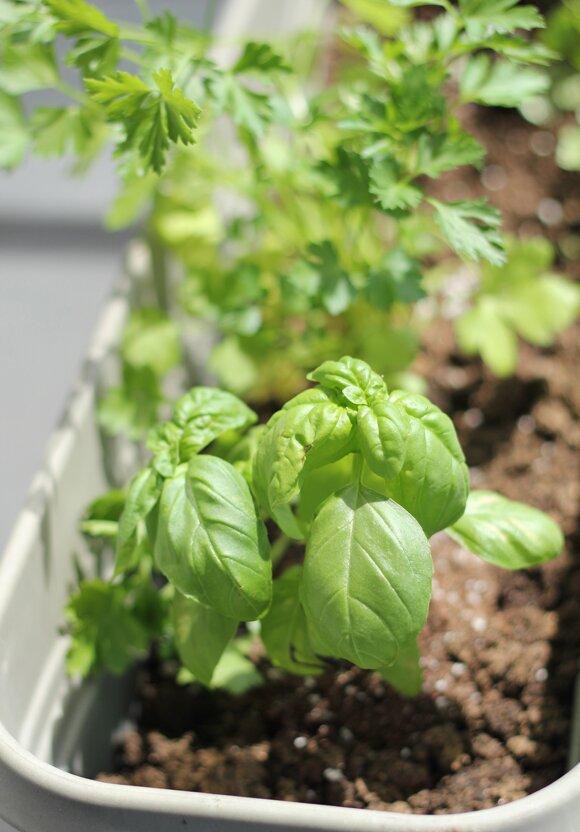
When I arrived home yesterday, I was craving some serious down time. After a nap and some time on the couch catching up on mindless TV, I decided it was high time to “plant” my herbs. In the past I’ve purchased seeds and grown the herbs myself, but since I got a bit behind schedule this year, I bought herbs that had already sprouted at the farmer’s market and planted those. I chose basil, flat leaf parsley, and cilantro for my herb box since I use those most in my cooking during the summer months. Even though I would hardly call getting my herbs set up “gardening,” it was so relaxing to park myself on our sunny patio and get my hands a little dirty. Just looking at these guys makes me happy. I’m really eager to pick up some more pots and plants to brighten up our patio even more for spring and summer. The only thing I’m struggling with right now is my cilantro. I’ve read it’s hard to maintain/grow. Have any of you struggled with that? Any tips would be much appreciated!

Hope your week is off to a great start.

Biz Notes: Work/Life Separation

Last week I started a new series which centers around my work life. Since I now work for myself and this whole business owner/entrepreneur thing pretty much occupies my mind all of the time, this series felt like a natural extension of Channeling Contessa.

This week I want to touch on work/ life separation, not to be confused with work/life balance. People talk about balancing their work and personal life all the time, but what if you have trouble separating the two?  Perhaps the phrases are somewhat synonymous, but lately I’ve really struggled with drawing a dividing line between my work and my personal life. Do you ever feel that way? I often feel like all my time bleeds together, which makes it very hard for my work mind to shut off.

I realize that because I have my own business, having a completely separate personal and professional life will never really be possible- and truthfully, I don’t really want that. I mean, I chose this path so that I would be doing something that I love, something that incorporated my personal interests- so naturally my work is going to overlap with my person life. But how do you mentally separate work related  stuff when it is so heavily intertwined with your personal life, so you don’t feel like you’re working all the time?

For me, having a separate work space is huge. I do love working from home in the morning, but if I don’t go out and work elsewhere, it feels like there’s zero structure to my day and I never truly feel “done” for the day (I’m still forcing myself to accept this fact- it can be really tempting to stay at home!). I also try to be as disciplined as possible about not checking email late in the evening on weekdays or on weekends. I struggle with the fact that it’s only me. Every communication can feel like a direct reflection of the quality of my business, and so I should be answering emails right away, all the time… right? I know, deep down, that’s wrong, but I still have to work pretty hard to put that into practice. And lastly, even though I feel I’m struggling specifically with with work/life separation, making a point of keeping my work/life balance in check helps. Making an effort to go to the gym regularly, take time to make dinner, read and spend time with friends keeps my mind busy with other stuff-meaning I’m not thinking so much about work.

It’s a constant struggle, but one of the biggest hurdles was realizing this (like everything else in my new work life), is going to take more time than I anticipated.  Patience, where are you??

Do you ever struggle with work/life separation? Whether you work for yourself or not, I’d love to hear your ideas and tactics for maintaining balance and separation!

Oreos Lover’s Cookies and Cream Ice Cream

Hello! I have to admit, I’m still brimming with excitement over the new design. It truly feels like such a fresh new start, pretty optimal timing for spring I suppose. I’ll stop talking about the new look though and get on to telling you about this incredible ice cream, but I did want to mention one quick thing- we’re still working on the “You might also like” links at the bottom of each post, hence the reason you don’t see anything there. So hold tight, it’s coming! Lastly, I’m facing a few issues with the sharing buttons when you actually open a post so hopefully that will be sorted out soon, too.

Now, on to ice cream. Since purchasing this book I’ve been utterly obsessed with making ice cream at home. After trying my hand at vanilla bean, I was ready to move to the next level- mix something in. Brandon was the brilliant mind behind trying Cookies and Cream and once he said out loud, I couldn’t think of a better flavor. The best part about making this specific ice cream at home is you can add as many oreos as you would like. Let’s just say, I was very generous with the oreos. Enjoy!

Oreo Lover’s Cookies and Cream Ice Cream adapted from Jeni’s Splendid Ice Cream at Home
Makes about 1 quart

The method outlined below provides the basic recipe for Jeni’s ice cream base. Feel free to add any mix ins or cookies you like!

  • 2 cups whole milk (I used organic)
  • 1 tablespoon plus 1 teaspoon corn starch
  • 3 tablespoons cream cheese, softened
  • 1/8 teaspoon fine sea salt
  • 1 1/4 cups heavy cream (I used organic)
  • 2/3 cup sugar
  • 2 tablespoons light corn syrup
  • 1 row of Oreo cookies from the package broken into large chunks

Prep: Make sure the canister of your ice cream maker has been in the freezer for at least 24 hours before making the ice cream. Mix 2 tablespoons of the milk with the corn starch in a small bowl to make a smooth slurry. Place the cream cheese in a medium size bowl (large enough to whisk together all the liquid later on). Fill a large bowl with ice- that will later become the ice bath.

Cook: Combine the remaining milk, the cream, sugar, and corn syrup in a medium size sauce pan. Bring to a roiling boil over medium high heat, and boil for 4 minutes. Remove from the heat and gradually whisk in the corn starch slurry. Bring the mixture back to a boil over medium high heat and cook, stirring with a heat proof spatula, until slightly thickened- about  1 minute. Remove from heat.

Chill: Gradually whisk the hot milk mixture into the cream cheese, stirring well to make sure there are no lumps. Once combined, pour the mixture into a ziploc bag and submerge in the ice. Add water to the ice to create an ice bath. Let chill until the mixture is very cold- about 1 hour.

Freeze: Pour the ice cream base into the frozen canister and turn on your machine. Let it run for about 25 minutes, until the ice cream is thick and creamy. Once spun, pack the ice cream into a tupperware container, mixing in the oreos as you go. Press a piece of parchment paper directly against the top and seal with an air tight lid. Place in the freezer for at least four hours or overnight if possible.

Say Hello to a New Face

Hello! Welcome welcome welcome to the new Channeling Contessa!!! I am so excited this day has finally come and I can share the new site with you all. Let me tell you, it’s been a long time in the works. I have the amazing Katelyn from Smitten Blog Designs to thank for transforming the ideas in my head into an actual blog. We’re still working out a few kinks so bear with me across the next few days.  But let me give you a little tour!

Recipe Index: On the nav bar at the top you’ll see a link for the new Recipe Index! I am so excited about this. For months I’ve been longing for a better way to organize and navigate my recipes, and this is just that. All my dishes have been broken down into categories, and each individual dish is listed so you can easily browse.

Delicious Finds: On the right hand side you’ll see “Delicious Finds.” Beyond the recipe index, I wanted a section dedicated to highlighting specific CC recipes- ones from previous years that feature seasonal ingredients, or great dishes that have perhaps gotten a little buried. I’ll be changing those up each month.

CC Life & Home: While Channeling Contessa is primarily a food blog, since I started it, it’s slowly grown and expanded into other areas, namely my home and my life. I wanted things to be a organized as possible in the new space, so I’ve pulled out those posts and am now listing them in their own section. I also hope to grow this section, specifically in the area of home decorating and organization- so stay tuned for that too.

Biz Notes: Last week I introduced a new series focused on sharing snippets of my work life, now that I run my own business. I’ve dedicated a specific section to that as well, as it’s an area I foresee growing immensely across the next few months.

Social Media: My new bright social media icons are hard to miss at the top, but what I’m even more excited about is the matching share icons at the bottom of each post! Aren’t they darling? They might be favorite thing about the whole space. Now it’s super easy to share anything and everything on CC.

I think that about covers it for now! I hope you enjoy it as much as I do. The new set up is so inspiring, I can’t wait to share lots of big beautiful photographs of my food, home, and life. I’ll be back tomorrow with the recipe for the delicious ice cream you see pictured above- have a great night!

Thai Beef and Noodle Salad

I could not be happier it’s Friday! This week started out on a sick note and then quickly transitioned to all my energy being focused on catching up on work. That combined with working most of last weekend has left me a little burnt out, so I’m thrilled to kick off my weekend a little early and be taking Friday off! Aaah… feels like such a treat. What makes it even better is that I have something super fun planned. After doing a little lounging and reading this morning I’m headed to a Biz Ladies Lunch at the Design Sponge offices in Brooklyn. I’m so excited to meet Grace, the founder of Design Sponge, as well as a bunch of women that work for themselves in the NYC area. It’s a pot luck, so the noodle salad you see pictured here is what I’m bringing with me.

A few things on this salad- yes, there are quite a few ingredients. But I assure you, they are all completely worth it! The flavors in this dish are downright addictive- Brandon and I have literally been eating it in various forms (once as a salad, once as a noodle salad) since Wednesday. It’s also ideal for entertaining because all the ingredients can be prepped the day before and then tossed together a half hour or so before serving. It’s best served a little cool or at room temp.You must add this dish to your spring/summer repertoire.

And with that I’m off! I hope you all have a wonderful weekend, with lots of time outside. Oh, and, the blog will be down a bit this weekend as I work on some things on the back end so thanks for your patience. If all goes according to plan I’ll have something very exciting to reveal on Monday… see you then!

Thai Beef and Noodle Salad inspired by Shutterbean and Camille Styles
Makes 4-5 entrée portions

For the salad (Note: You can swamp out the noodles and serve with two heads of torn romain lettuce, just use a bit less dressing.)

  • 1 lb linguine (or any fine noodle)
  • 1/2 pound skirt steak
  • big bunches of cilantro, mint, and basil roughly chopped (should equal about 1 1/2 cups)
  • 2 carrots peeled and shaved with a vegetable peeler
  • 1/2 an English cucumber, thinly sliced
  • 1 bell pepper (red, yellow or orange) thinly sliced
  • 1 cup cherry tomatoes cute in half
  • 1/2 cup roughly chopped roasted peanuts
  • Steak marinade: 2 cloves garlic crush, 1 T fish sauce, 2 T soy sauce, and 1 T sugar

For the dressing:

  • 2 T and 2 tsp fish sauce
  • 2 T and 2 tsp sesame oil
  • 1 T soy sauce
  • 3 tsp Sriracha
  • 4 T brown sugar
  • 4 T peeled, minced fresh ginger
  • 1/2 cup fresh lime juice (about 4 limes)

Marinate the Steak: Place the steak in a large Ziploc freezer bag, add in steak marinade ingredients. Shake bag around and massage steak a bit to mix everything together. Place in fridge for at least 30 minutes prior to cook, but up to 1 day- the longer it marinates, the better. Remove from the fridge 15 minutes before cooking to bring to room temp.

Cook the pasta until al denté (about 8 minutes), drain and toss with a little vegetable oil. Set aside.

Heat a cast iron or heavy bottomed frying pan over medium high heat for 5 minutes. Once heated place the steak in the pan and cook for 4 1/2 minutes on each side. While the steak is cooking, mix together ingredients for the dressing. Once the steak has finished cooking, place it on a plate, cover it in tin foil, and let it rest while you prepare the rest of the salad.

Place the noodles, vegetables, and herbs in a large bowl. After the steak has rested, thinly slice it against the grain and add two thirds of it to the salad. Pour in the dressing and toss well to combine. Place the noodles on a large platter and top with the remaining steak and crushed peanuts.

New Series: Biz Notes

Hi all! I’ve got a new series to introduce today which I’m really excited about. Ever since mentioning I had officially made the transition to working for myself/starting my own business, I haven’t said too much else about the topic. That is about to change! The truth is, my mind is in such a different place these days. When I first started Channeling Contessa, is was solely a creative outlet for my culinary creations. Nowadays, I (thankfully) have many more creative outlets on my plate (ie: my work!) that go well beyond the kitchen and occupy my brain all day long. Thus it only feels natural to share more of that here.

My mind is brimming with ideas for this series, but I want to start things off in a simple and organized manner. So first things first, I’m going to break it down for you guys and share what a typical day looks like in my world these days. Here goes!

7:30-8 am: Wake up I aim to get out of bed around 7:45 am each day. I actually don’t set an alarm. I have a crazy internal body clock which can prove to be pretty frustrating on weekends, but gets me up on time during the week.

8-10:00 am: Breakfast and Work  Once out of bed I make coffee or tea and start work, which usually consists of emails and blog stuff while I’m still waking up. This is my favorite time of day- I love the morning light that pours into our apartment and I love being able to start my work day from the comfort of my own home. Breakfast usually consists of yogurt with honey and almonds or toast with almond butter.

9:45- 11 am: Prep for the “Office” After taking care of any morning priorities I hop in the shower and get ready to go to the “office.” Yes, office. Last month I started renting shared office space here in Brooklyn. While I love the flexibility of working from home I was starting to feel cooped up and cafés were just too noisy, so now I spend a few days a week here. I love it! The people are so sweet and there’s even a little dog named Sushi who hangs out with us.

11 am- 5:30 pm: Work at the Office These are my usual hours at the co-working space. I’ve found working here to be incredibly productive- more so than any other office I’ve worked it. Not much but work happens during this period- I usually bring something to eat and snack on it at my desk (and pet Sushi from time to time).

5:30-6:30 pm: Head Home & Prep for the Gym The office is a solid half hour walk from my apartment, so I shoot to leave by 5:30 so I can get home and change for the gym, as well as clean up the apartment a bit.

6:30-7:30 pm: Gym Time When I’m not traveling (or suffering from the stupid flu), I aim to make it to the gym 3 weekdays and 1 weekend day. Exercise is so crucial for my mental health, so I really look forward to my workout. Most days I do about 20 minutes of cardio and spend the rest of the timing lifting weights.

7:30 pm- 9 pm: Shower and Prep Dinner At 7:30 I’m hustling to finish my workout and head home to prep dinner. Usually I’m reheating leftovers or making something simple like a big salad and quesadillas, which doesn’t require too much time and effort. We eat around 8:15/8:30 and linger until around 9 pm. Sitting down for dinner is one of my favorite parts of the day- the down time and catching up with Brandon helps keep me sane.

9- 11 pm: Blogging, Light Work, and Prepping for the Next Day The majority of my evening time I spend blogging, but occasionally they’ll be a little work, and often I do a bit more tidying of the apartment and prepping meals, etc. for the next day. Some nights I’ll catch up on my TV shows – I’m currently watching Mad Men, Smash, and Bethenny Ever After (no judging!).

11-11:45 pm: Prep for bed, reading, and lights out! In an ideal world I’m in bed with teeth brushed just a little after 11 so I have a solid amount of time to read. I’m currently reading Spontaneous Happiness. Next on my list- 50 Shades of Grey!

Aaand I think that’s it! Obviously not everyday is like this- at least one night a week I have dinner or drinks with friends or we go out, and some weekdays I’ll take advantage of my work from home schedule and go to the gym in the morning or hit up Trader Joe’s when it isn’t a mad house. As simple as it sounds, this whole work from home schedule took me quite some time to figure out- I just now feel like I’m starting to get the hang of it. If there’s one thing having my own business has really taught me thus far, it’s that I need to be more patient! In time…

Image Source

Fried Artichoke Salad

Hello! And happy Monday! Apologies for the lateness of this post. I was having an all around great weekend and looking forward to a pretty routine week, but then yesterday afternoon I got hit with a nasty stomach flu which left me out of commission for all of Sunday and most of today. Seriously, this one came out of absolute nowhere! I’ve been pretty unlucky in terms of getting sick this season, so here’s hoping this is the last of it.

I’m still in recovery mode but I wanted to tell you guys about this delicious salad I made last week. The inspiration for this dish came from a restaurant in our neighborhood which makes a crispy artichoke salad with creamy garlic dressing. I had it a few weeks back and I have yet to stop thinking about it, so I was determined to recreate it at home. Here’s the deal: artichoke hearts get cut in half and then dredged in flour, egg, and a bread crumb and parmesan cheese mixture.  They’re lightly fried and then served on top a bed of greens. I think a salad like this calls for a creamy dressing, but I didn’t want anything too heavy, so I tossed it in a bit of Ashley’s greek yogurt Caesar dressing.

The cool thing about this dish is that it not only makes a great entrée style salad for a brunch or special lunch, but the fried artichokes alone make for the most satisfying appetizer. It was nearly impossible not to gobble them all up before plating up the salad. And especially paired with the greek yogurt style Caesar, they are truly to.die.for.

Hope your week is off to a much better start than mine!

Fried Artichoke Salad

Makes 3 entrée portions or 4 appetizer portions

  • 1 can artichoke hearts, drained, patted dry, and cut in half
  • 1/2 cup flour
  • 1 egg, beaten
  • 1/2 cup parmesan cheese
  • 1/2 cup breadcrumbs
  • vegetable oil for frying
  • 8 cups mesclun greens
  • salt and pepper to taste
  • 2 wedges fresh lemon

Make the dressing: For ingredients and instructions, please check out Ashley’s post!

Prepare the artichokes:  Set up your dredging station- one bowl with the beaten egg, one bowl with the flour seasoned with half a teaspoon salt and half a teaspoon pepper, and the last bowl with the breadcrumbs and cheese mixed together. Set a large frying pan to medium high heat and coat very generously with vegetable oil.  While the oil is heating, dredge the artichoke hearts, placing them in the flour, then egg, and then breadcrumb mixture.  Line a dish with a paper towel and set aside.  Place the artichokes in the pan and fry until golden brown on both sides. Once cooked, place them on a paper towel to drown. Season immediately with salt.

In a large bowl toss the greens with an ample amount of dressing.  Plate the greens on a large rectangular platter (or place into bowls).  Put the artichokes on top and finish with a squeeze of lemon and some shaved parmesan.

Wait, you’re not on Facebook?

Earlier this week I caught an awesome Biz Ladies/ Design Sponge post on How to Escape the Comparison Trap. Are you prone to the comparison trap? I fall into it all the time. I’m really good at it. I can’t tell you how many times I’ve read another blog or looked at someone’s event planning business and thought “Why can’t I be like them? I want what they have!” It’s really productive.

Luckily, I’ve gotten a bit better at stopping these thoughts in their tracks. They crop up from time to time, but mostly I’m able to dismiss them quickly, realizing they won’t accomplish anything, and that in reality, I’m very happy with my life. Becka, the girl who wrote the article, shares some great tips for paring down the online clutter in your life to actively keep from falling into the comparison trap. I follow most of her recommendations, but there’s one in particular I’ve really exercised to the maximum.  And that would be Facebook.

I’m not on it.

This wasn’t always the case. I joined Facebook during college and stayed on until December 2009. If you had asked me in late 2009 or early 2010 why I got off, I probably would have told you it was because I was studying for the GMAT. This was kind of sort of… ok really, not at all true. I said it anyway though, because I was afraid to be honest with people as to why I got off.  But the truth is, the reasons I got off have a lot to do with the comparison issues Becca talks about in the article. Facebook made me constantly compare myself to other people, and because of that, I always felt like I had to “prove” how great and fun my life was on it. If I was posting pictures, it was partially because I wanted to share the pictures with my friends, but also because I wanted it to seem like I had fun! I went out! My life was so great!

Along with the tendency to try and “prove my life,” I also felt like Facebook brought out some of my worst qualities. I can have a bit of a jealous and possessive streak, and by viewing other peoples profiles or seeing other’s activities on Facebook, I would get jealous of people or possessive over weird things that in actuality, I really didn’t care about.

Some people could recognize these tendencies and just decide not to go on Facebook but keep their account. That wasn’t going to work for me. I don’t have that much self control! So I de-activated my account. That’s not as scary as it sounds. Even if you deactivate your account, for a certain amount of time Facebook still keeps all your account info. Still, it was hard. I was very tempted to go back on in the beginning. I remember at one point an old co-worker got engaged, and immediately upon hearing about it I went back on Facebook to check out her photos. But after looking at them I was kind of like, huh, that’s it? So I tried to remember that feeling every single time I was tempted to go back on.

People’s reactions were really funny. Some friends asked me to go back on, though they weren’t the people I was closest with.  A lot of people thought it was crazy that I wasn’t on it, they couldn’t imagine how I lived without it. In the beginning I thought about what I was “missing” all the time, but now I hardly ever do. And the funny thing is, it actually made me invest more in my friendships. Now, instead of writing on someone’s wall or commenting on a photo, I send them an email, catch up over the phone, or send a handwritten note around holidays. Yes, it is more of a challenge to remember birthdays (!), but my friends are all pretty understanding. In the beginning it freed up a lot of my time. Now, between my own blog, reading other blogs, and Twitter, I probably spend more time than ever before online.  Nonetheless, I think not having Facebook in my life is still beneficial, especially when it comes to comparing myself to other people.

The purpose of this post is by no means to tell you to get off Facebook. I think this was something that, selfishly, I kind of wanted to say for a while. Everyone I know is on Facebook, so I’m definitely in the minority. And the truth is, between my blog and business, I may actually need to get back on Facebook for work purposes in the near future. But for now, I’m good without it and hardly ever think about it.

If you made it through, bravo! I’m so curious, have you thought about getting off Facebook or disconnecting from any social media? Have any good techniques for staying out of the comparison trap?  I’d love to hear!

Photo Credit

Scenes from Easter Sunday

So as I mentioned on Monday, I headed home this past weekend for the holiday. I always go home for Easter, and even though we don’t really celebrate the holiday in a traditional manner, we always eat really well (naturally).

Every time I’ve gone home in the past few months, my mom has been making these insanely delicious blueberry buttermilk pancakes. I literally can’t get enough of them, they’re truly the best pancakes I’ve ever had. The key is in the buttermilk. It’s important to have really fresh, good quality buttermilk (my mom used this one ). Beyond that, you need to be really liberal with the butter when making these. Along with the butter in the batter, you’ll need several tablespoons to keep the pan generously coated while you’re frying up the cakes. My mom kept a stick right next to the pan, and in between each batch added another 1/2 tablespoon or so to the pan. This makes for a very indulgent pancake so if that scares you away, I urge you to save them for a special occasion and not skimp on the butter!  Aside from that, she eliminates the sugar in the batter. There- that makes them a little better.

Here’s a few shots from that day. Do you have a favorite pancake recipe? Certainly send it my way if you do!

Jeni’s Vanilla Bean Ice Cream with Caramelized White Chocolate Shell


Good morning! How have you been? Thank you all for being so patient during my stay-cation spring break. I actually did take a little trip home this weekend, and while it was nothing out of the ordinary, a massage, many uninterrupted hours of Bravo, and having my mom cook for me for three days straight made it feel like a little vacation. It was exactly what I needed!

I’m feeling refreshed and excited to share all I’ve been eating, cooking, and doing. I thought I would start the week off on a sweet note and provide a full report on my first homemade ice cream making experience. In case you didn’t catch this post, a few weeks back I purchased an ice cream maker and a cookbook to go with. I opted for Jeni’s Splendid Ice Creams as I had heard such good things about her cooking process for making incredible ice cream at home. It certainly lived up to all the hype, as this batch of vanilla ice cream I made was truly some of the best ice cream I’ve ever had.  I also love the book because it provides a great balance between technique, ice cream recipes, and homemade toppings and mix-ins for the ice cream. To go with the vanilla ice cream, I made her caramelized white chocolate shell. Do you remember that chocolate sauce you could pour on ice cream, and then once it hit the ice cream it would harden? This is exactly that! Who knew you could make it at home with just chopped chocolate and coconut oil? I’ve shared that recipe below, too.

This is truly just the beginning with this book. Now that I’ve got the technique down, there are so many more recipes I want to try. Luckily I’ve got  a handful of parties coming up and I already know exactly what I’m bringing. I’ll, of course, share everything here. Have a great week!

Vanilla Bean Ice Cream from Jeni’s Splendid Ice Creams

Makes about 1 quart

  • 2 cups whole milk (I used organic)
  • 1 tablespoon plus 1 teaspoon corn starch
  • 3 tablespoons cream cheese, softened
  • 1/8 teaspoon fine sea salt
  • 1 1/4 cups heavy cream (I used organic)
  • 2/3 cup sugar
  • 2 tablespoons light corn syrup
  • 1 vanilla bean, split, seeds scraped out, seeds and bean reserved

Prep: Make sure the canister of your ice cream maker has been in the freezer for at least 24 hours before making the ice cream. Mix 2 tablespoons of the milk with the corn starch in a small bowl to make a smooth slurry. Place the cream cheese in a medium size bowl (large enough to whisk together all the liquid later on). Fill a large bowl with ice- that will later become the ice bath.

Cook: Combine the remaining milk, the cream, sugar, corn syrup, and vanilla seeds and bean in a medium size sauce pan. Bring to a roiling boil over medium high heat, and boil for 4 minutes. Remove from the heat and gradually whisk in the corn starch slurry. Bring the mixture back to a boil over medium high heat and cook, stirring with a heat proof spatula, until slightly thickened- about  1 minute. Remove from heat.

Chill: Gradually whisk the hot milk mixture into the cream cheese, stirring well to make sure there are no lumps. Once combined, pour the mixture into a ziploc bag and submerge in the ice. Add water to the ice to create an ice bath. Let chill until the mixture is very cold- about 45 minutes.

Freeze: Remove the vanilla bean. Pour the ice cream base into the frozen canister and turn on your machine. Let it run for about 25 minute, until the ice cream is thick and creamy. Once spun, pack the ice cream into a tupperware container. Press a piece of parchment paper directly against the top and seal with an air tight lid. Place in the freezer for at least four hours or overnight if possible.

Caramelized White Chocolate Bombe Shell

  • 12 ounces white chocolate (chopped or chocolate chips)
  • 1/3 cup coconut oil

This stuff is a little tricky- you really have to watch it while it cooks so it doesn’t caramelize too quickly. If you’d like to make just a white chocolate shell (or any other chocolate for that matter), use the same proportions and just heat the chocolate and coconut oil until melted. If you’re feeling ambitious, this can also be used to dip cones!

Combine the white chocolate and coconut oil in a sauce pan and cook over medium low heat, stirring until melted and smooth. Continue to cook, stirring constantly, until the mixture reaches a deep amber color- 12 to 15 minutes. Remove from the heat if the chocolate seems to be getting lumpy and caramelizing too quickly. Serve immediately or store in the fridge up to one month. It will harden once in the frideg so to melt it, place the container in a bowl of hot tap water and stir occasionally, just until liquified and smooth.