Scrambled Egg & Avocado Breakfast Sandwich

Do you ever get hooked on a dressing? A dressing or sauce you either purchased or made and it’s so delicious, you find yourself putting it on everything? I have a new one. It’s a lighter version of Caesar dressing made with Greek yogurt. I usually despise any “lightened” version of a dressing or sauce, but that feeling completely goes out the window when it comes to Greek yogurt. The tanginess of the yogurt is such a welcome change to the traditional Caesar dressing.

You’re probably thinking, “Caesar dressing? Where’s the salad?” Yes, well, I did make a salad-and I loved it on the salad. But then the leftover dressing made its way onto my newest sandwich obsession, soft scrambled eggs and creamy avocado on hearty 9-grain toast. I loved the flavors of the dressing on the sandwich even more!

And that was the start of it all. Now the possible flavor combinations seem endless. Wouldn’t this be perfect for shrimp cocktail, a fresh crudité, or even as dressing for  a summer slaw? All these visions are really making me crave spring and summer, and all the wonderful in season food that comes with it! March, are you here yet?

Scrambled Egg and Avocado Breakfast Sandwich
Serves 2

Making the Dressing: The recipe for the dressing was the brilliant work of Ashley. I follow her directions exactly and urge you to do the same. The recipe will make more than you need for the sandwiches, but it keeps really well.

For the sandwich:

  • 4 slices hearty whole wheat bread
  • 4 eggs
  • 1 avocado, diced
  • 1/2 T butter
  • 2 T milk
  • 1/4 tsp sea salt
  • pepper

Toast the bread. Spread a generous amount of yogurt on one side of the bread, and smash half the avocado into the other side of the bread. Repeat with the remaining bread and set aside.

Set a small frying pan to medium low heat.  Melt the butter in the pan. Beat the eggs, milk, salt, and pepper to taste in a bowl. Pour the eggs into the pan and cook slowly, gently scraping the eggs off the bottom of the pan until they’re just cooked.

Spoon the eggs onto the bread. Assemble the sandwiches and serve immediately with greens.

Tuning Out the Noise

Aaaah… how was your weekend? Mine was unexpectedly wonderful. Nothing out of the ordinary happened, it was just one of those weekends where the perfect balance of productivity, relaxation, and time spent with friends somehow fell into place.  I feel pretty proud of myself, actually! I’ve been struggling lately with the separation between work and life.

I’m certainly not complaining. I’m very thankful to be so busy and  have multiple many projects at play. Nonetheless, it’s still daunting.  I find that when my schedule gets this way, the things I used to enjoy, like cooking, working out, or reading a book, become chores. I dread doing them because it seems impossible to mentally separate myself from everything else in my life and truly enjoy going running or preparing dinner. I have a hard time tuning out the noise, and being present. Does that ever happen to you?

I sort of stumbled on a solution to my problem. Being a avid follower of Joy the Baker, I started exploring her other online work- Homefries. Have you guys heard of Homefries? It’s a collection of podcasts (and other cool stuff) curated by Joy the Baker, and some amazing other bloggers/people. There are multiple podcasts to choose from, but I’m totally hooked on the Joy the Baker Podcast and We’re About to be Friends. Ok, I’ve also listened to a fair amount of the Simple Mom Podcasts (I’m preparing!).

I didn’t realize it initially, but I became so into these podcasts, I found myself making time to listen to them. I had no problem shutting off work at the end of the day and starting dinner, because it meant I could listen to the newest podcast! Same thing went for getting my  butt out the door for a lunch time run. For some reason, listening to podcasts allows me to completely tune out all the thoughts running through my head and truly take a break. I like the Homefries ones especially, because it feels like two close friends chatting next to me, except I just get to listen and take it all in, instead of engage.

Do you listen to podcasts? Do you find them relaxing? How do you disconnect and tune out the noise?

Ps: And if you have podcasts to recommend, please send them my way!

Photo Credit

Homemade Cinnamon Raisin Bread

This week has felt all over the place.  I haven’t been this relieved for Friday’s arrival in a long time. I’m really looking forward to having some time this weekend to re-group, get work things in order, and spend some time with friends. Hopefully there will be some good sleep in there, too!

In all honesty, I don’t even know how I managed to make this bread! Looking back, I don’t really know where I fit it in, but I’m so glad I did. I have been wanting to make homemade cinnamon raison bread for what feels like years.  It’s definitely one of those breads that feels more challenging than others, but truly the most difficult part is the waiting- there’s a lot of rising time. The dough itself though, is fairly simple to work with. So if you’re feeling intimidated, I urge you to give it a try.

And with that, I’m off to make more toast, and perhaps even french toast this weekend. Yum! Have a wonderful weekend!

Homemade Cinnamon Raisin Bread slightly adapted from The Pioneer Woman

  • 1 cup milk
  • 6 tablespoons butter
  • 2-1/2 teaspoons active dry yeast
  • 2 whole eggs at room temperature (very important!)
  • 1/4 cup sugar
  • 2 cups all-purpose flour
  • 1 1/2 cups whole wheat flour
  • 1 teaspoon salt
  • 1/4 cup sugar
  • 2 tablespoons cinnamon
  • 1 cup raisins
  • egg and milk, mixed together for brushing
  • 2 tablespoons soften butter

Melt butter with milk. Heat until very warm, but not boiling. Allow to cool until still warm to the touch, but not hot. Sprinkle yeast over the top, stir gently, and allow to sit for 10 minutes. Meanwhile, combine flour and salt in a separate bowl.

In the bowl of an electric mixer fitted with the paddle attachment, mix sugar and eggs until combined. Pour in milk/butter/yeast mixture and stir to combine. Add half the flour and beat on medium speed until combined. Add the other half and beat until combined.

Switch to the dough hook attachment and beat/knead dough on medium speed for ten minutes.

Heat a metal or glass mixing bowl by filling it with hot tap water so it’s warm. Pour out the water and dry the bowl. Drizzle in a little canola oil, then toss the dough in the oil to coat. Cover bowl in plastic wrap and set it in a warm place for at least 2 hours. A few minutes before I place the dough in the bowl, I put my oven at 150 degrees and let it heat up. When the dough is ready, I turn off the oven, place it inside, and let it rise inside the slightly warmed oven. The oven should feel warm, but not hot.

Turn dough out onto the work surface. Roll into a neat rectangle no wider than the loaf pan you’re going to use, and about 18 to 24 inches long. Smear with 2 tablespoons melted butter. Mix sugar and cinnamon together, then sprinkle evenly over the butter-smeared dough. Starting at the far end, roll dough toward you, keeping it tight and contained. Pinch seam to seal.

Smear loaf pan with softened butter. Place dough, seam down, in the pan. Cover with plastic wrap and allow to rise for 2 hours.

Preheat oven to 350 degrees.

Mix a little egg with milk, and brush over the top. Bake for 40 minutes on a middle/lower rack in the oven.

Remove from the pan and allow bread to cool. Slice and serve, or make toast or French toast with it.

Old School Snacks

Look familiar? Did you eat “Ants on a Log” growing up? I actually did not, but we happened to have the three key ingredients in our cupboard and fridge this week (well, I used almond butter instead of peanut butter), and I couldn’t help but indulge in such an old school treat.

This snack got me thinking about what I ate religiously growing up. I was, and still am, a cereal fiend. I really can’t buy the stuff too often because I always plow through it at lightning speed. I’ve likely eaten more than my weight in Granny Smith apples dipped in peanut butter, and PB&J sandwiches. And, I vividly remember going through a period where I melted string cheese in the microwave and then proceeded to eat in slowly by pulling apart the melty strands with a fork. That snack still sounds kind of good now!

So I’m curious, what did you eat growing up? Do you still eat it? I could still eat apples and peanut butter and PB&J sandwiches all day long and I’d be perfectly content.


Bright Citrus Salad

Just looking at this salad makes me happy! In an effort to infuse as much color (and Vitamin C) into our meals these days, I put together this salad for lunch yesterday.  Sadly my sniffles last week turned into a full on cold virus, which I lovingly transferred to Brandon on Sunday.  How nice, right?

I’m slowly making my way back into the kitchen, and when I saw the oranges sitting in our fridge I knew we needed to ingest them all- pronto.  This salad not only contains fresh orange, but the juice from the oranges is used in the dressing, making for a tangy but sweet flavor. I so often use fresh lemon juice in my salad dressing, but rarely orange juice.  That’s definitely going to change after making this salad!

Bright Citrus Salad
Makes 4 appetizer portions, or 2 large portions

  • 1 large head or 2 small heads Boston Bibb or butter lettuce, washed and torn into large pieces
  • 3 small or 2 large oranges
  • 1/3 cup thinly sliced red onion
  • 1/2 cup apple cider vinegar
  • 1/3 cup olive oil
  • sea salt
  • freshly ground pepper

Place the red onion in a small bowl, t pour apple cider vinegar over onions and sprinkle with a large pinch of sea salt. Let rest 30 minutes prior to serving.

Cut the top and bottom off of each orange to create a flat surface.  Cut the rind and pith from the orange, working your way around the orange and being careful to remove as little of the fruit as possible.  Then cut the fruit into segments and squeeze the remaining juice of the orange into a large bowl (you’ll toss the salad in here). Repeat with remaining oranges.

To the large bowl add one teaspoon of the vinegar from the onion mixture, 1/4 teaspoon sea salt, and some freshly ground pepper.  Stream in the olive and whisk to combine.  Put the lettuce in the bowl and toss to combine.

Plate the salad on a large tray, layering the lettuce down first, and then placing the orange segments and red onion on top.  Serve immediately.

Take That, Winter Blues

I don’t know about you guys, but New York has been under a dull gray sky for what seems like forever.  The weather, coupled with being holed up in my apartment for days had left me feeling pretty… meh.  Does that ever happen to you?

Even though is was raining and cold out last night, I forced myself out of my apartment and went to meet one of oldest friends (I realized yesterday, we’ve been friends for 18 years!) for dinner. Once we sat down, had some delicious appetizers and started chatting, it was like everything dull washed away and my mood totally brightened.

Just getting out and seeing a friend made all the difference, which I’ve decided is the best antidote for fighting the winter blues. What’s your method? We’ve got a few more weeks of winter left, so I need all the tips I can get!

Photo Credit

Grilled PB&J

Yesterday I was feeling a bit under the weather, so the idea of cooking something that required little more than putting two pieces of bread together and spreading peanut butter and jelly in the middle seemed impossible. Still craving something comforting to enjoy with my hot cup of tea, I decided that instead of the traditional PB&J, it needed a little twist.  Out came the butter and sea salt and I got to work prepping my grilled PB&J sandwich. I probably don’t need to tell you that when you bring buttery crispy bread into the mix with melty sweet peanut butter, it is beyond delicious.  This sandwich is perfect for those lazy day eats, but would also make for a playful breakfast, lunch, or even dessert if you swapped out the jelly for.. oh say, Nutella?  Yum!

Grilled Peanut Butter and Jelly Sandwich

Makes 1 sandwich

I probably don’t need to give you exact instructions to prep you PB&J sandwich, so do that to your liking!  Then, take a one tablespoon of softened butter and spread it on each outside part of the sandwich. Sprinkle a little sea salt on each side. Set a small frying pan to medium heat, let warm for a few minutes.  Then place the sandwich in the pan and grill for five minutes on the first side, and 3-4 minutes on the second side until golden brown.  Watch closely so it doesn’t burn.  Cut in half and enjoy immediately!

Smashed Black Bean & Spicy Chicken Quesadillas

First off- thank you all so much for your support on my new venture, it means so much to me!  After such a super long post though, I think we need to get right back into the food.

Mexican food rarely happens on purpose in our household for some reason. We always have avocados and black beans, which we use for various other dishes, but rarely for the purpose of making say… quesadillas.  After purchasing ingredients to make nachos last week in honor of the Superbowl (yes, we ate Superbowl food even though we didn’t actually watch it), we were left with many of the typical ingredients needed for Mexican food. These quesadillas were simply the outcome of those leftovers, but they were so delicious, I intentionally bought the same ingredients to make them again this week. This batch features a combo of black beans and chicken, but the ones I made last week included avocado, not chicken. I have to admit, I liked the avocado batch better! Nonetheless, this version is quite tasty, too.

Have you ever noticed how avocado is always a topping for Mexican dishes but never featured inside the dish?Why is that? I find it so, so good! Enjoy!

Smashed Black Bean & Spicy Chicken Quesadillas

Makes 4 entrée portion servings

  • 2 boneless skinless chicken breasts
  • 1/2 tsp red pepper flakes
  • 1/2 tsp cumin
  • 1/2 tsp smoked paprika
  • 1/2 tsp salt
  • 1 can black beans, drained and rinsed
  • 8 whole wheat tortillas
  • 2 cups grated Monterey Jack (or whatever you have on hand)
  • 1 cup diced cherry tomatoes
  • pickled jalapeños and hot sauce (optional)
  • salsa and sour cream for serving

Prep your ingredients: Set a medium size frying pan to medium high(ish) heat.  Place a bit of vegetable oil in the bottom of the pan and let the pan warm up for 5 minutes. While the pan is heating, mix together all spices and liberally coat each side of both chicken breasts.  Once pan has heated, put the chicken in the pan and cook for 5-7 minutes on each side depending on how thick your meat is. Once cooked, shred chicken into bite size pieces.

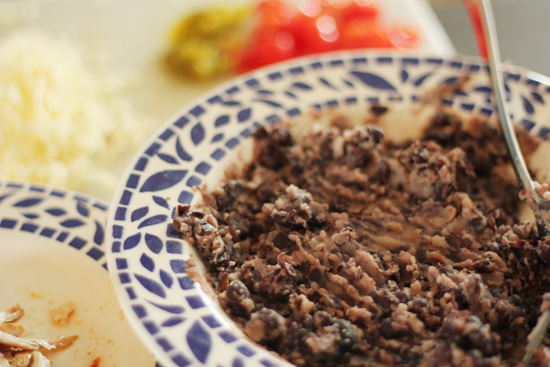
Place your black beans in a large bowl and mash them roughly with the back of a fork (they don’t need to be completely smooth).

Assemble the quesadillas:  Preheat the oven to 250 degrees. Place a large baking sheet inside the oven.

Place one tortilla in a large frying pan.  Sprinkle 1/2 cup of cheese, a quarter of the chicken, and a quarter of the diced tomatoes. Top with hot sauce and pickled jalapeños if desired. Take another tortilla, and press the smashed beans into a single layer.  Place that tortilla on top of the one in the pan. Place a dinner plate on top of the tortilla, along with something heavy like other canned goods, to press down the quesadilla. Bring the heat to medium and let cook for 7 minutes. Flip and let cook for 5 minutes on the other side.  Place quesadilla in oven to keep warm while preparing remaining quesadillas. Cut and serve once all are cooked.

Why I’m Smiling These Days

Last Thursday night, I set out to do some research and round up my favorite Ina recipes for a belated birthday celebration in her honor. Just a few minutes into my work I got somewhat sidetracked, and began watching Ina’s Google talk. I’m terrible at keeping up on stuff like this, and certainly should have watched this talk sooner than I did.  I say this not just because I’m such a fan of her cooking, but because apparently, there’s a lot I can learn from her that doesn’t involve food.

As some of you may already know, before Ina became the Food Network star and best selling cookbook author that she is, she owned a specialty food store in South Hampton.  That food store was the Barefoot Contessa.  She ran the store for over 20 years, growing it to over 100 employees. After running the store for such a long time, she was ready for something new. For years she mulled over what she should do next in her career. During this period, a friend of her’s shared a very interesting piece of advice. Her friend stated that type A people think they can figure out what they’re going to do next while they’re doing something else, and they can’t. They have to stop and do nothing.  I heard that phrase and literally stopped dead in my tracks. Suddenly the last six months of my life made COMPLETE sense.

Before I explain why this phrase had such an impact on me, a little more on Ina. After getting this feedback, she decided to sell her shop, and quite literally do nothing.  In her talk she reveals she actually did nothing but think about what she wanted to do for a full year, at which point she finally decided to start writing cookbooks, which then lead to her show on the Food Network and where she is today.

Six months ago I wrote a post and shared I was taking time off. I needed the time to think, slow down, and figure out what I really wanted in my career. At the time it was so hard to accept (and admit) that I was actively not pursuing a job. Unlike Ina, I wasn’t as clear on the notion that not working was the exact thing I needed to understand what I truly wanted. Figuring out what I wanted my next career move to be definitely didn’t happen overnight, but it most certainly was fueled by my decision to take a break.

I had worked as a corporate event planner for the last few years, but never seriously considered doing it on my own- having my own business. Then, early this fall while I was in break mode (and thanks to some amazing former colleagues), I was hired as an independent event planner. That work somehow translated into even more work and clients. Once I got a taste of what it was like to work for myself in this space, I was completely hooked and the direction of my career became much clearer.  It didn’t take too long to realize that having my own event planning business was exactly what I wanted.

So with that, I’m thrilled to announce the launch of clara persis events! In comparison to what I wrote back in September, I can’t believe where I am just six short months later. I’m blown away by the opportunities that have come my way by putting myself out there just a little bit, and how amazing it feels to be so happy and proud in relation to what I do. Entrepreneurship definitely doesn’t come without its challenges and risks, but I’ve never been more excited to take on such hard work.

There’s so much more I want to share about my new path, but for today, I think I owe Ina a little shout out (or Ina’s wise friend!). Despite now having a strong sense of direction in my career, it’s still quite daunting. It’s hard to know if I’m going about things the right way, and to rely largely on my own instinct. Ina and I are far from the same, but knowing how she made such a major transition in her career makes type A people like me breathe a little easier. It brings great comfort to know the decision I made six months ago was the right one for me, and that now, even if I’m not sure where things are going 100 percent of the time, I just need to keep going.

If you’ve made it this far- thank you! There was really no other way to get this story out. I hope you’ll pop over to my new site and see what my business is all about. I’m looking forward to sharing all there is to come with you all! xoxo

One More Sweet Treat for V-Day

Happy Saturday! My apologies for not getting this to you all yesterday. The day was far busier than I expected. Busy in a good way though, as there are some amazing things to come (!), but for now, let’s talk macaroons.

A few weeks back I traveled to Toronto for work and stayed at the Fairmont Royal York. Within my two day stay I managed to consume six of their signature macaroons, and ever since them I’ve been dreaming about the pairing of chocolate and coconut.  I know coconut is not for everyone, but I find if you do like it, then you really really like it.  So for those of you who really like it- these are for you. And for those of you who are not fans of coconut, I say just forget the cookies and purchase some strawberries. All that’s left are the chocolate and sprinkles!

I have a big announcement on Monday that I’m so excited to share with you all. Until then, enjoy the rest of your weekend!

Chocolate Dipped V-Day Macaroons
Makes roughly 18 macaroons

  • 3 1/2 cups unsweetened coconut
  • 1 cup sweetened condensed milk
  • 1/3 cup flour
  • 1/4 tsp salt
  • 2 egg whites
  • 1 tsp vanilla extract
  • 1 bag milk chocolate chips
  • heart sprinkle (optional)

Make the macaroons: Preheat the oven to 325 degrees. Line a large baking sheet with parchment paper and spray well with non-stick spray.

Mix together the coconut, flour, sweetened condensed milk, and vanilla.  It will be very sticky, but stir well to combine.  In a separate bowl, beat the egg whites and salt until they form stiff peaks.  Gently fold the egg whites into the coconut mixture.  Drop the mixture in heaping tablespoon mounds on the parchment paper, leaving an inch and a half of space in between each. Bake for 22 to 25 minutes until lightly browned.  Remove from the oven and let cool for 5 minutes on the pan and then move to a cooling rack.  A word of caution, these little guys can really stick to the pan.  Don’t worry if you end up have to peel the parchment paper off- I certainly did!

Dipping an Sprinkles:  Place the chocolate chips in a medium size bowl.  Place them in the microwave for 30 second increments, stirring well after each increment until the chocolate is completely melted.  Dip the cooled macaroons in chocolate, top with sprinkle if desired, and place on parchment paper to set. Macaroons can be stored in an air tight container up to 5 days.