Our Christmas Date

I can be pretty terrible when it comes to choosing gifts for my boyfriend.  I have a tendency to choose things I would like him to have, rather than what he actually wants, and well, that doesn’t always work out! Luckily he’s very understanding, but I didn’t want to have that happen this holiday. So instead of exchanging Christmas gifts, I suggested we celebrate over a special dinner. Once Brandon was on board, I knew exactly where we should go. There’s something extra special about a classic New York restaurant during the holidays, and it doesn’t get more classic than Union Square Café. I knew it would be the perfect spot.

The whole experience went well beyond the hype. Our food was sheer perfection, my cocktail was truly the best drink I’ve ever had in my life, and our waitress made the whole night unforgettable.  We topped off the evening with a visit to the tree in Rockefeller Center, which, despite the fact that it was 10:30 pm on a Thursday night was still surrounded by throngs of people! It was totally worth it, though. I never tire of seeing those lights, and it felt like the perfect way to end the holiday season.


Homemade Chicken Noodle Soup

I arrived back in the city yesterday and was happy to ease back into our old routine. I love the holidays, and my family had a great one, but after the flurry of parties and constant eating I find myself craving my normal schedule. Tuesday afternoon I spent a good hour placing a huge grocery order and I was thrilled to find all our food neatly stacked in boxes, ready to be unpacked, right when I walked in the door. Pumpkin Cheesecake has been a staple in my diet since Saturday so I was eager to welcome some healthier foods back into my life.  To me, there’s something so comforting about unpacking the groceries and filling our bare fridge and cupboards with lots of fresh food. Later in the afternoon I made a huge batch of granola, and then last night, Brandon and I caught up in the kitchen while making a batch of homemade chicken noodle soup. With breakfast and lunch set for the week, I think normal life has officially returned.

Homemade Chicken Noodle Soup generously adapted from The Pioneer Woman
Serves 6

  • 1 whole chicken, cut into 8 pieces
  • 3 tablespoons olive oil
  • 3 carrots, diced
  • 2 stalks celery, diced (plus a few leafy tops for the stock)
  • 1/2 whole medium onion, diced
  • 3 cloves garlic, minced
  • 3 teaspoons salt
  • 1 teaspoon Turmeric
  • 1/2 teaspoon fresh black pepper
  • 1/4 teaspoon (heaping) ground thyme
  • 12 ounces egg noodles
  • 3 Tablespoons All-purpose Flour
  • fresh parsley for serving

In a large pot, cover the chicken with 4 quarts (16 cups) of water.  Cover and bring to a boil, then simmer partially covered for 30 minutes.

Once cooked, remove chicken and let cool.  While it’s cooling cut up your carrots, celery, onions, and garlic.  Set another large pot to medium low heat. Place olive oil, onions, carrots, and celery in pot and sauté. Cook over medium low heat, stirring occasionally, while you prepare the rest of the dish.

Once the chicken is cooled, using your hands pull all the meat off the bones until they’re practically bare, and return the bones to the stock pot. Bring stock back up to a simmer, and simmer with bones for 45 minutes.  We also added in a few stalks of leafy celery.  You could add that as well as more carrots or onion- whatever you have on hand.  Or you can just simmer the bones. While the stock is cooking, shred the chicken, removing any skin or tough parts. During the last 10 minutes of cooking, at the garlic to the vegetable pot.

Once the stock is cooked, strain the bones and vegetables, and pour the stock into the vegetable pot. Add in the spices and let simmer for 15-20 minutes until flavor have melded. Then add in the chicken and noodles, cooking for 8-10 minutes, until noodles are fully cooked.  Lastly, place the flour in a small cup.  Add a bit of water to make a liquid-y paste.  Add the paste to the soup and stir well.  Let cook for an additional 5 minutes so soup can thicken. Once cooked, taste and add additional salt and pepper if necessary. Serve immediately with fresh parsley on top. Soup can be stored up to 5 days in fridge.

The Easiest Wrapping Tip

Though I may be organized in certain parts of my life, I am a chronic last minute wrapper. I am always wrapping my gifts the day before Christmas. This year is no different, but I’ve gotten much better at wrapping over the years thanks to a simple tip I learned when I worked in retail.

During high school I worked in a gorgeous boutique in my home town. I loved being in the store around the holidays.  Everyone was so happy and excited to be getting gifts for loved ones. Being the lowest level employee, I was responsible for most of the gift wrapping. I dreaded it initially, but the store manager gave me the simplest technique of folding the paper to create clean lines, that it actually made the process enjoyable. To this day, I use to this technique on every gift I wrap. It doesn’t require any fancy tools or ribbon. All you need is paper, scissors, and tape.  Here’s how you do it:


Now you’re going to apply the same folding technique to create clean lines on the side of the box. Before doing this be sure the box is tape side up.

If you’re comfortable getting a little fancy with the ribbon I think an off-set bow, closer to the top of the package, is really lovely.  But I also love the look of just a thick sparkly ribbon tied once around the package.  Either one is sure to impress!

And with that I hope you all have a wonderful holiday.  Our feasting begins tonight and I can’t wait! xx

Prepping for the New Year

I don’t know about you guys but before I go away for the holidays or a trip, I become a little obsessed with cleaning and organizing my apartment. Brandon can attest. A few years back we were leaving for Europe for two weeks and he literally had to tell me to stop cleaning so we didn’t miss our plane.  But for this holiday, I was prepared! I’ve spent the last few evenings blissfully scrubbing, mopping, vaccuming, throwing things away, and organizing closets and drawers so we can come home to a clean slate for 2012. Highlights of the cleanse included washing every single linen in our home (including our duvet cover!), organizing our sock drawers (and getting rid of those lone socks!), removing all the dust from of our baseboards, and whittling the contents of our fridge down to barely nothing so nothing goes to waste while we’re away.

Ha… how obsessed are you with cleaning? And what do you think of the last photo? It’s our new living room rug and I’m pretty in love with it.


Brown Sugar Ginger Cookies

I think this is a cookie Santa would like.

When we were growing up, and my brother and I believed in Santa Claus (did you think for a second I still did?), we always, like most kids, put cookies out for Santa on Christmas Eve. I can’t recall specifically what type of cookies they were, but I know they were simple. Nothing weighed down with candy or lots of chocolate chips, just a perfectly spiced cookie.  That’s the type of cookie my mom likes, which in hindsight is probably the reason we put those ones out (since she was responsible for Santa’s nibbles).

So if you’re baking for Santa this year, I recommend making these classic ginger cookies that are sweetened completely with brown sugar.  Bake them for just 8 minutes (no more!) to make them irresistibly  chewy. I’m pretty sure Santa likes his cookies really chewy.  And don’t forget the reindeer- they need carrots and celery.

Ps: You may have noticed some of my cookies are thick, and some are more flat- see the recipe for directions on how to achieve each shape.

Brown Sugar Ginger Cookies adapted from Joy the Baker
Makes 2 1/2 dozen cookies

  • 2 cups all-purpose flour
  • 2 teaspoons baking soda
  • 1/2 teaspoon salt
  • 1/2 teaspoon ground cinnamon
  • 1/2 teaspoon ground ginger
  • 1 1/2 teaspoons grated fresh ginger
  • 1 1/2 sticks (6 ounces) unsalted butter, softened
  • 1 1/4 cups dark brown sugar
  • 1 teaspoon pure vanilla extract
  • 1 large egg
  • granulated sugar for rolling

In a medium bowl whisk together flour, baking soda, salt, cinnamon, and ginger. Set aside.

Place butter and brown sugar in the bowl of an electric stand mixer.  Beat on medium speed until light and fluffy, about 3 to 5 minutes.  Stop the mixer and scrape down the sides of the bowl.  Add the egg, vanilla extract, and grated ginger and beat on medium speed for one minute more.

Add the dry ingredients, all at once, to the butter and sugar mixture.  Beat on low speed until the dough begins to come together  and the flour disappears.  Stop the mixer and finish incorporating the ingredients with a spatula.  Once all the flour is thoroughly mixed in, cover the bowl with plastic wrap and refrigerate for 30 minutes.

Place a rack in the center and upper third of the over and preheat oven to 350 degrees F.  Line two baking sheets with parchment paper. Scoop heaping tablespoons of dough into your hand, roll into a ball, then roll the ball around in granulated sugar to coat.  If you like thicker cookies, place the ball of dough directly on the baking sheet.  If you like thinner, but still chewy, cookies, flatten the balls into a small disc in your hand.

Bake cookies for 8 minutes, or until lightly browned around the edges.  Cool on the pan for 5 minutes, before transferring to a wire rack to cool completely. Cookies will last, in an airtight container at room temperature, for up to 5 days.

Grilled Goat Cheese, Cheddar and Apple Sandwich

There’s a restaurant in my home town that has a build your own sandwich option on their menu. The meats, cheeses, and sandwich add ons are over the top- think homemade aioli, smoked onions, and cured Moroccan olives. I have a friend from high school, who, whenever we go, always goes the make your own sandwich route, and each time she does it she asks for a grilled cheese with goat cheese and granny smith apples.  I have never ordered the sandwich myself but I’ve always had that combo (in sandwich form) in the back of my mind.

Sunday was an apartment day. One of those days I stayed tucked inside folding laundry, getting our home organized before we leave town for the holidays, and purchasing the last of my Christmas gifts. On days like this I usually forego lunch and just snack my way through the afternoon.  But today I noticed my fridge contained both goat cheese and granny smith apples and I was quickly reminded of my friend’s favorite grilled cheese.

I don’t need to tell you how good grilled cheese is, but what I can tell is this combo is a keeper. I added cheddar into the mix to balance the texture. In my mind a grilled cheese isn’t complete without a good melting cheese in between the bread, so the cheddar gives you that. It’s also a natural complement to granny smith apples and pairs well with the tangy goat cheese. As you can see from the photos this is a seriously gooey, melt, and totally irresistible grilled cheese. I could have eaten six!

Grilled Goat Cheese, Cheddar, and Apple Sandwich
Recipe for 1 sandwich

  • 2 slices whole wheat bread
  • 3 T goat cheese
  • 1/4 cup grated sharp cheddar
  • 1/4 of a granny smith apple, thinly sliced
  • s+p
  • softened butter for grilling

Spread the goat cheese on one slice of bread. Top it with a single layer of apples and the shredded cheddar. Season with salt and pepper.  Top it with the second slice of bread and press down gently.  Take a bit of softened butter and spread it on the outward facing side of the top piece of bread. Set a small frying pan to medium low heat and place the sandwich in the pan, buttered side down. Cook for 5 minutes until just golden brown. Before flipping the sandwich, spread butter on the other side of the sandwich that’s not yet grilled. Flip and then cook for an additional 5 minutes until the bread is golden brown and the cheese fully melted. The key to a good grilled cheese is cooking it slowly at low heat- don’t rush it!

Fit for Entertaining

Instead of hosting a holiday party this year, I decided to host a handful of little dinner parties across the month of December. Since our new dining table arrived it’s been so nice having friends over to our apartment for comforting meals.

I used to want to do absolutely everything myself when hosting a dinner party, but I’ve slowly gotten better at letting others assist and not choosing the most elaborate menu. It’s much more fun that way!  Now I’m totally obsessed with serving dishes that can be made well in advance of my guests arriving, so all I have to do is reheat it when everyone is ready to eat. My mom is an expert at this, so when I was lacking ideas for dishes for a dinner last weekend- I turned to her for inspiration.  She happened to be hosting a dinner party that same night, and recommended the dish she was making- a Chicken Curry with Cashews. I don’t make Indian food that often, but I was a little bit desperate so I decided to give it a go.

Thankfully, the dish came together beautifully. I lessened the amount of chicken and added in some chickpeas, which turned out really well.  We had leftovers and the dish actually got better as it sat longer in the fridge- a sign that you should definitely make this one ahead! It also doesn’t take that long to throw together if you’re making it the night of, so it’s perfect for both planned and last minute holiday celebrations.

Chicken Curry with Cashews adapted from Gourmet
Serves 6

  • 1/2 stick (1/4 cup) unsalted butter
  • 2 medium onions, finely chopped (2 cups)
  • 2 large garlic cloves, finely chopped
  • 1 tablespoon finely chopped peeled fresh ginger
  • 3 tablespoons curry powder
  • 2 teaspoons salt
  • 1 teaspoon ground cumin
  • 1/2 teaspoon cayenne
  • 2 1/2 pounds boneless skinless chicken breast cut into large chunks
  • 1 19 oz can chickpeas
  • 1 (14.5-ounce) can diced tomatoes
  • 1/4 cup chopped fresh cilantro
  • 3/4 cup cashews (1/4 pound)
  • 3/4 cup 2% or whole Greek yogurt
  • 2 cups cooked jasmine or basmatti rice for serving

Heat butter in a 5- to 6-quart wide heavy pot over moderately low heat until foam subsides, then cook onions, garlic, and ginger, stirring, until softened, about 12 minutes. Add curry powder, salt, cumin, and cayenne and cook, stirring, 2 minutes. Add chicken and chickpeas and cook, stirring to coat, 3 minutes. Add tomatoes, including juice, and cilantro and bring to a simmer, then cover and simmer gently, stirring occasionally, until chicken is cooked through, about 25-30 minutes.

Pulse cashews in a food processor or electric coffee/spice grinder until very finely ground, then add to curry along with yogurt and simmer gently, uncovered, stirring, until sauce is thickened, about 5 minutes. Serve curry over a bed of cooked rice.

This dish can be made up to five days in advance. If you’d like to make it ahead, cook the chicken and chickpeas and leave out the yogurt and cashews. Add the yogurt and cashews as outlined above right before serving.

My Best Reads of 2011

I’m deep into my newest book, A Tree Grows in Brooklyn, and I absolutely love it. Brandon makes fun of me a little, claiming I’m just reading this book because we moved to Brooklyn, but I hardly mind because it is so so good! My secret plan is to try to get him to read it once I’m done.

With 2012 just around the corner, I’ve been thinking about all the books I’ve read this year. I keep a list so I can keep track, and when I glanced back the other day I realized many of the books from this year’s list have become some of my all time favorite reads. There are multiple ones on my list I’d love to read again and would highly recommend to friends. So, I thought I’d share a few with you all in hopes you’d tell me your favorite books! I have a couple on my list for 2012, but not many- so recommendations would be much appreciated.  Here are mine:

Room by Emma Donoghue  Room tells the story of 5 year old Jack and his Ma, who live in an 11 x 11 square foot space.  Jack has lived his entire life in this single room, with no exposure to the outside world.  As the room becomes more and more of a prison to Ma, and Jack grows bigger, it becomes clear they must escape. The story follows their escape and Jack’s experience seeing the outside world for the very first time. I read this one in just a few days, you won’t be able to put it down!

The Immortal Life of Henrietta Lacks  by Rebecca Skloot If I were even to begin to describe what this book is about, you’d likely scratch your head in disbelief that I’d even be interested in reading about the first “immortal” human cells grown in culture. Yes, this is a book about cells.  But the story behind where they came from is absolutely incredible. You must must must read this book.

Half Broke Horses by Jeanette Walls While I absolutely loved Jeanette’s book The Glass Castle, I was especially fond of the sequel- Half Broke Horses. It didn’t get as much attention as the first, but it’s such an incredible book. The story follows the life of Lily Casey Smith, Jeanette’s maternal grandmother. Jeanette’s writing style and story telling abilities are down right addictive.  Read both back to back, you’ll be completely hooked.

Setting  The Table by Danny Meyer Have you heard of Danny Meyer? This book made me want to drop everything and go waitress in one of his restaurants! He opened his first restaurant in New York, Union Square Café, at the age of 27 and has since grown his restaurant group, Union Square Hospitality, into one of the world’s most dynamic restaurant organizations. The story of his business is fascinating, and though this book doesn’t read like a business book, his insights are really applicable to any business or organization. You don’t have to be interested in food to love this one!

Has anyone read these books too? What’s on your list of best reads for 2011?

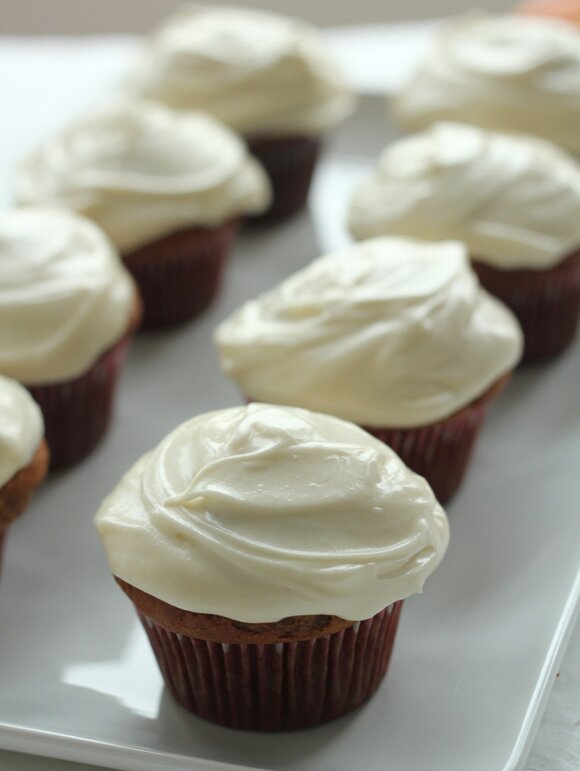
Pumpkin Cake with Cream Cheese Icing

In the back of the Contessa’s newest cookbook there’s a stunning photo of a banana cake lathered in cream cheese icing. I’ve been drooling over this cake for months but haven’t made it because, well, I absolutely hate bananas! After reading over the recipe though, I had a feeling I could substitute the banana with puréed pumpkin.

This past Saturday afternoon, I gave my idea a go. I brought the cake to a dinner party that night and everyone loved it, so I think it’s safe to say it was a success! Feel free to do banana instead of pumpkin, but I have to say this is one of the best pumpkin cakes I’ve ever had.  The cake is incredibly moist and not overly sweet.  And the best part? No fussy icing job!  You just spread the icing thickly across the top of the cake, making this a completely stress free dessert, perfect for the holidays.

Pumpkin Cake with Cream Cheese Icing adapted from the Barefoot Contessa “How Easy Is That?”

Serves 8-10
For the cake:

  • 1 cup pumpkin purée
  • 3/4 cup sugar
  • 1/2 cup dark brown sugar
  • 1/2 cup vegetable oil
  • 2 extra large eggs at room temp
  • 1/2 cup greek yogurt (2% or full fat)
  • 1 tsp vanilla extract
  • 2 cups all purpose flour
  • 1 tsp baking soda
  • 1/2 tsp kosher salt
For the frosting:
  • 8 oz (1 stick) unsalted butter, at room temperature
  • 8 0z cream cheese, at room temperature
  • 2 cups powdered sugar
  • 1 tsp vanilla extract

Preheat the oven to 350 degrees. Grease and flour a 9 x 2-inch round cake pan (I used a springform pan).

In the bowl of an electric mixer fitted with the paddle attachment, or using a hand mixer, mix the pumpkin and sugars on low speed until combined. With the mixer still on low, add the eggs, oil, yogurt, and vanilla.  Mix until smooth.

In a separate bowl, sift together the flour, baking soda, and salt. With the mixer on low, add the dry ingredients and mix until just combined. Pour the batter into the prepared pan and bake for 45- 50 minutes until a cake tester or tooth pick comes out clean.  My cake was done at 45 minutes.

While the cake is baking, beat together the cream cheese and butter until just combined. Add in the powdered sugar and mix until smooth.

Once the cake is done baking, let is cool in the pan for 15 minutes, then turn onto a wire cooling rack and let it cool completely.  Once cooled, spread the frosting thickly on the top of the cake.

Our (Baby) Christmas Tree

I wasn’t intially planning on getting a Christmas tree this year.  My family always gets a big tree and we dedicate one night before Christmas to blasting holiday music, trimming the tree, and decorating the entire house. It’s a huge production, so there’s no shortage of holiday decorating in my life.  But this Saturday when we were walking around Williamsburg after brunch, we spotted these adorable little trees with built in wooden bases that I just couldn’t resist! We promptly snatched one up and Brandon carried it home. It’s tiny but I love the way it lights up our living room. I’m looking forward to having it around in the days leading up to Christmas.

Along with getting our Christmas tree, we had back to back dinner parties with great friends. I think that may be my favorite way to spend the weekend (lots of good food and recipes to share from that this week). Hope your weekend was just as festive!