Recipe Testing for Lara Ferroni

If cooking a Thanksgiving feast wasn’t enough, I’ve been busy in the kitchen for the past few days testing recipes for the amazing cookbook author and food photographer, Lara Ferroni. I’m certainly not complaining though!  It’s been really fun and I’m excited to tell you all about it.

If you’re not familiar with Lara she’s an extremely talented food photographer and accomplished cookbook author.  She’s now working on her next cookbook that features delicious sweet and salty treats but without all the junk (ie ingredients you can’t pronounce). Definitely my style of cooking!  Lara asked me to test recipes for her peanut butter stuffed pretzel balls and chocolate caramel cookie sticks. Considering I’m both a peanut butter and caramel addict, I was thrilled I got to try these recipes.

Unfortunately I’m only here to tempt you with Lara’s yummy treats- the recipes can’t be released quite yet.  But what I can tell you is that you should most definitely snag this cookbook once it’s available next fall! From these two recipes alone I know her book will secure a spot on my cookbook shelf.  Thanks for allowing me to help, Lara!

A Pick Me Up

Yesterday was gorgeous but today it is full on gray and rainy in NYC. However, things are a bit brighter in our apartment thanks to Brandon’s birthday! As you can tell, November is a big month for birthdays around here. Since Brandon leaves for a work trip today, we celebrated last night with a lobster roll feast followed by extra fancy beers and wine. I definitely need to eat lobster more often on Monday nights.

To bring a little brightness to your day, I wanted to share a video of a trip we took last fall to Spain and Morocco. Brandon made this video and it never fails to put me in a good mood! Thanks for always making me smile, Brandon, I hope you have a wonderful birthday! xoxo

Sweet and Salty Brownies

Hello! And happy Monday. I hope you all had a wonderful Thanksgiving! Ours was great. My mom and I started cooking on Tuesday and pretty much worked straight through til’ Thursday. I love the tradition of cooking together and each year it gets better and better with new dishes and more strategic planning!

Since you’re all probably very tired of eating or hearing about pumpkin pie, I decided to share our “other” Thanksgiving dessert with you today.  We always have a second dessert to accompany the pumpkin pie. In my mind, chocolate pairs best with pumpkin so I was in need of a decadent chocolate dessert.

I don’t read a lot of food magazines, but I do read a lot of food blogs. So when a picture of a dish gets seared in my memory, it’s usually from one of my favorite blogs. I had this image in my head of a sweet and salty brownie from Dana’s blog (Dana Treat) from months ago. I couldn’t even place when I read it, but I could still recall the description of this amazing brownie and knew instantly that’s what we needed to make.

This is not your typical brownie. You may have guessed that from the title but what I didn’t tell you is that this brownie also includes a thin layer of fleur de sel caramel melted into the center making it the most incredible brownie I’ve ever tasted.  If you are a fudgey brownie lover, you will die and go to brownie heaven. Words can’t do justice to how good this baked good is, so you should probably just make it.

Sweet and Salty Brownies from Baked Explorations/ Dana Treat

When trying a new baked good, I always follow the recipe exactly. So that’s what I did in this situation.  Instead of rewriting the entire recipe I urge you to head over the Dana’s blog to not only read about these brownies but to check out all the other amazing recipes she has.  I’ll admit, this is not the simplest of brownie recipes, so I’ve listed a few tips based on my experience. Don’t be deterred those, these are well worth the effort!

  • When stirring the sour cream into the caramel, be sure to use a whisk so it doesn’t clump.
  • Before stirring the eggs into the chocolate, make sure the chocolate is truly room temp.
  • When stirring the flour into the chocolate the mixture will feel clumpy- that’s ok, keep going.
  • I found it difficult to keep the caramel from spreading to the sides of the pan.  The original recipe mentioned this would cause it to burn, but I didn’t experience that.
  • These are great made a day ahead, which makes them perfect for entertaining!  Let them cool completely, then store in the fridge if serving the next day.  If they’re cold, they’re much easier to cut.  Cut them and then let them come to room temp before serving.

Thanksgiving: Decorating the Table

When it comes to Thanksgiving I like a simple table with natural elements.  I headed to the fabric store last night to pick up some pieces to pull our table together. I knew we would be using green plates and white cloth napkins, so I wanted something clean yet festive to complement those colors. I chose a few yards of a muted green burlap to serve as the main runner, and then grabbed a roll of gold tulle to lay on top of the burlap for some sparkle and warmth.  Then, down the center of the table, I’m placing miniature pumpkins with a few branches of red berries tucked underneath.

I’m so pleased with the results. And the best part?  It cost me less than fifteen dollars. The only thing I paid for was the fabric and pumpkins (the berries I cut from our yard).  This is proof you don’t need to spend a fortune! So when designing your table, first see what have around your house (both inside and out), then choose a simple color palette, and round out your plan with a few store bought elements.

There’s much cooking to be done so I’m off to the kitchen. I hope you all have a delicious Thanksgiving! Happy eating!

Mashed Potatoes: This Year’s Secret Ingredient

Well maybe it’s not so secret, and I really can’t take credit for it, but I can tell you it’s really really good. This year I’m putting cream cheese in our Thanksgiving mashed potatoes.  Yep, cream cheese!

Do you guys cook with cream cheese?  I’m a little bit obsessed with it.  Yes I love it on bagels but I find when I have some around, it’s always useful in whatever I’m cooking, whether I’m thickening a sauce or making a dish a little bit more indulgent. And in mashed potatoes it is unbelievable.  We can’t credit this one to Ina, it’s full on Pioneer Woman. I haven’t talked  much about Ree Drummond here but I’ve always liked her recipes, and I think she’s a solid go to when it comes to fool proof comfort food. I made a variation of these mashed potatoes a few weeks back and shortly after I told my mom we had to have them at Thanksgiving!  I can’t wait to top them with gravy and cranberry sauce.

I modified the recipe a little bit by cutting back on the butter.  I know, I know, me of all people! I really do love butter,  but the amount used was even a bit too indulgent for my tastes.  It is Thanksgiving though, so feel free to go all out! Either variation is sure to be delicious.  Oh, and the best part?  You can make it a day ahead! You can never have too many make ahead dishes on Thanksgiving.

I’ll be back a little later tomorrow with some super simple tablescape ideas that I’m very excited to share. And, in case you need it- here’s a stellar sweet potato recipe. Happy holiday prepping!

Creamy Mashed Potatoes slightly adapted from the Pioneer Woman
Serves 10

  • 5 pounds Russet Or Yukon Gold Potatoes
  • 1 stick of butter, softened
  • 1 package (8 oz) cream Cheese, Softened
  • 1/2 cup (to 3/4 cups) whole milk
  • 1 teaspoon sea salt
  • 1/2 teaspoon freshly ground black pepper

Peel and cut the potatoes into pieces that are generally the same size. Bring a large pot of water to a simmer and add the potatoes. Bring to a boil and cook for 30 to 35 minutes. When they’re cooked through, the fork should easily slide into the potatoes with no resistance, and the potatoes should almost, but not totally, fall apart.

Drain the potatoes in a large colander. When the potatoes have finished draining, place them back into the dry pot and put the pot on the stove. Mash the potatoes over low heat, allowing all the steam to escape, before adding in all the other ingredients.

Turn off the stove and add the butter, cream cheese, and milk. Mash until very smooth with a potato masher. Next, add salt a pepper. Taste for seasoning and add a bit more if necessary (do not under salt!).

Stir well and place in a medium-sized baking dish or oven proof bowl.  Place them in a 350-degree oven and heat until potatoes are warmed through (15-20 minutes).

Note: When making this dish a day or two in advance, take it out of the fridge about 2 to 3 hours before serving time. Bake in a 350-degree oven for about 20 to 30 minutes or until warmed through.

Photo Credit

Tuna Tartines with Hummus

A few weeks back, Brandon was placing an Amazon order. It was one of those random orders- a new shower curtain, a cable for his computer, and some tea. After placing the order he came into our bedroom to say we were all set, but mentioned he had added something else to the order. Tuna. When I asked how much tuna he had ordered, he sheepishly replied “I think… twenty four cans.”

Needless to say, Brandon is of the buy in bulk mentality.  Me- not so much, which is why he chose to tell me of his purchase after he had clicked submit. I laughed because I knew he was right. I would have never have agreed to that! I like tuna but twenty four cans? I don’t like it that much and the idea of having that much of it on hand makes me like it even less!

Even though I say I’m against it, I’m such a hypocrite when it comes to buying in bulk. I’ll resist and resist and then we’ll buy a huge quantity of something and I get used to having it around forever. Then it’s ok- it’s been accepted into the group of things we can buy in bulk and I’m totally into it. Toilet paper? Yes. Dishwasher soap? Fine. Ten pounds of rolled oats? Let’s do it (I make granola every week).  But I was so not ready for the tuna. Until I tried this recipe.

I vaguely remembered an interesting recipe for tuna sandwiches in my Ina cookbook “How Easy Is That?”.  So when the tuna arrived, I looked to that. I’ll admit, this is one of those recipes that has somewhat of an annoying ingredient list.  Ironically enough we had most of the ingredients on hand, and after making it I can tell it truly is worth the effort to purchase all the ingredients (I’ll definitely be making this again). I know many people don’t like tuna fish, but if you do like it- you will love this. Even if you only like it a little, I think you’ll be surprised. Oh, and I’m calling them tartines because they’re open face sandwiches and, well,  it sounds cuter!

Tuna and Hummus Tartines adapted slightly from the Barefoot Contessa “How Easy is That?”
Makes 6 sandwiches

  • 14 ounces jarred or canned Italian tuna in olive oil
  • 1/4 cup minced celery
  • 2 tablespoons minced scallions
  • 3 tablespoons minced cornichons
  • 1 tablespoon freshly squeezed lemon juice
  • 2 tablespoons good mayo
  • 1 teaspoon Dijon mustard
  • 1/2 teaspoon kosher salt
  • 1/4 teaspoon freshly ground black pepper
  • 6 slices hearty whole wheat bread
  • hummus, store-bought or homemade (recipe follows)
  • Fresh carrots or radishes, sliced
  • 2 cups canned chickpeas, drained, liquid reserved (15.5-ounce can)
  • 1/3 cup tahini or sesame paste
  • 2 teaspoons minced garlic (2 cloves)
  • 3 tablespoons freshly squeezed lemon juice (3 lemons)
  • 2 teaspoons kosher salt

Drain the oil from the tuna, reserving the oil. Place the tuna in a mixing bowl and flake it with a fork. Add the celery, onion, cornichons, lemon juice, mayonnaise, 2 tablespoons of the reserved oil, the mustard, salt, and pepper and mix well. Cover and refrigerate for a few hours to allow the flavors to develop.

Toast the bread and spread each slice with a layer of hummus. Spread the tuna salad on each piece of bread, garnish with slices of radish, and serve immediately.

For the Hummus: Place the chickpeas, 2 tablespoons of the reserved liquid, the tahini, garlic, lemon juice, hot sauce, and salt in the bowl of a food processor and process until coarsely pureed. The hummus should be moist and thick; add more lemon juice or reserved chickpea liquid to thin, if necessary. Cover and refrigerate for several hours for the flavors to blend. Taste for seasonings. Yield: 2 cups.

Weeknight Simplicity: Winter Squash Soup

Oh my God is this good. I know that’s exactly what Ina says, but the statement couldn’t be more true when it comes to this soup. You will be blown away on so many levels.  First, I would have never thought to categorize this as a simple weeknight meal until I learned how easy it is to peel a butternut squash with a vegetable peeler (why was I ever going at that thing with a knife?).  You could take it a step further and just purchase pre-cut squash.  Second, who knew adding pureed pumpkin to butternut squash soup would make such a difference? We were totally totally shocked, but now are oh so addicted. It’s officially my new favorite fall soup, fall dish, fall weeknight meal- fall everything.  Do yourself a favor and double the recipe.  It freezes really well, but I have a feeling you’ll be polishing off the pot in no time!

Have a great weekend!

Winter Squash Soup slightly adapted from Barefoot Contessa in Paris
Serves 4

  • 2 T butter
  • 1 T good olive oil
  • 2 cups chopped yellow onions (1 large 2 small onions)
  • 1 15 oz can pumpkin puree
  • 1 1/2 lbs butternut squash peeled and cut into chunks
  • 3 cups chicken broth
  • 2 tsp salt
  • 1/2 tsp freshly ground black pepper
  • 1 cup half and half or 1/2 cup heavy cream

Heat the butter and oil in a heavy bottom stockpot, add the onions and cook over medium low heat for 12-15 minutes, or until translucent. Add the pumpkin puree, butternut squash, chicken stock, salt, and pepper.  Cover and simmer over medium low heat for about 20 minutes, until the squash is very tender (pierced easily with a fork). Using an immersion blender, blend the soup until it’s very smooth.  Once blended add the half and half or heavy cream and heat slowly.  Serve with a toasted baguette or croutons. The crouton you see in my photo is sliced baguette that’s been toasted under the broiler and then brushed with a little melted butter.  They’re dangerous but delicious.

Happy Birthday, Mom!

Yep- another birthday! My mom’s birthday falls just a few days after mine, and I couldn’t start today without a special note on the blog to her. So- happy birthday, mom! We love you so much!

I’ve said it before but my love of food and cooking stems directly from my mom. I really learned how to cook by watching her, and I can only hope to be just as good of a cook as her one day. We ate like absolute kings growing up! Seriously, even our school lunches were enviable, which reminds me of a really funny story.

We loved and appreciated my mom’s cooking, and so did many of our friends. My brother discovered he could actually  make some extra cash during lunch at school by selling what my mom had packed him, and spending only a portion of the profits on something cheap from the school cafeteria.  Yes- my brother was selling my mom’s turkey sandwiches to his friends during the middle school lunch hour.  My mom only came to find out when she was stopped by another mother in the grocery store who wanted to know what kind of bread she bought for Teddy’s (my brother’s) school lunches! I don’t recall my Teddy getting in trouble, I think we all thought the whole situation was hilarious. I still die laughing thinking about this today.

So thanks for all the amazing school lunches and meals, mom!  Hope you have a wonderful birthday. xoxo


My Stuffing Philosophy

I’m not gonna lie, I think my family’s stuffing is the best. No other stuffing is superior; my mother’s stuffing is sheer perfection. I don’t want to research new recipes, I just want the same sausage, apple, and cornbread stuffing she’s been making for years.

But don’t you feel the same way? Don’t you think your family’s stuffing is the best? I think most people feel this way, which is why I decided against posting a recipe and instead want to talk about my stuffing philosophy.  Even though I want no other stuffing on Thanksgiving, stuffing is stuffing and there are tons of other delicious recipes out there.  But here are my three requirements- you need something savory, you need something sweet, and you need a decent mix of breads. For savory I think something like sausage, thick cut bacon, or pancetta. For sweet I love granny smith apples, but what about pears or some sort of dried fruit like cranberries or dates? That would be delicious. And lastly- the bread. You need at least two kinds, if not three.  My family’s recipe includes peasant bread, whole wheat, and homemade corn bread. I don’t think I’ll ever give up having corn bread in my stuffing but there are so many other interesting and flavorful breads out there. What about rye, pumpernickel, or sour dough?

So tell me- what do you guys put in your stuffing?  Do you need something sweet and salty? What kind of bread do you use? Anyone have any good vegetarian stuffing recipes? I’d love to hear!

Ps:  If you’re interested in seeing my family’s recipe (I promise, it’s amazing!), leave a comment and I’ll email it to you!

Photo Credit

Homemade Caramel Sundaes

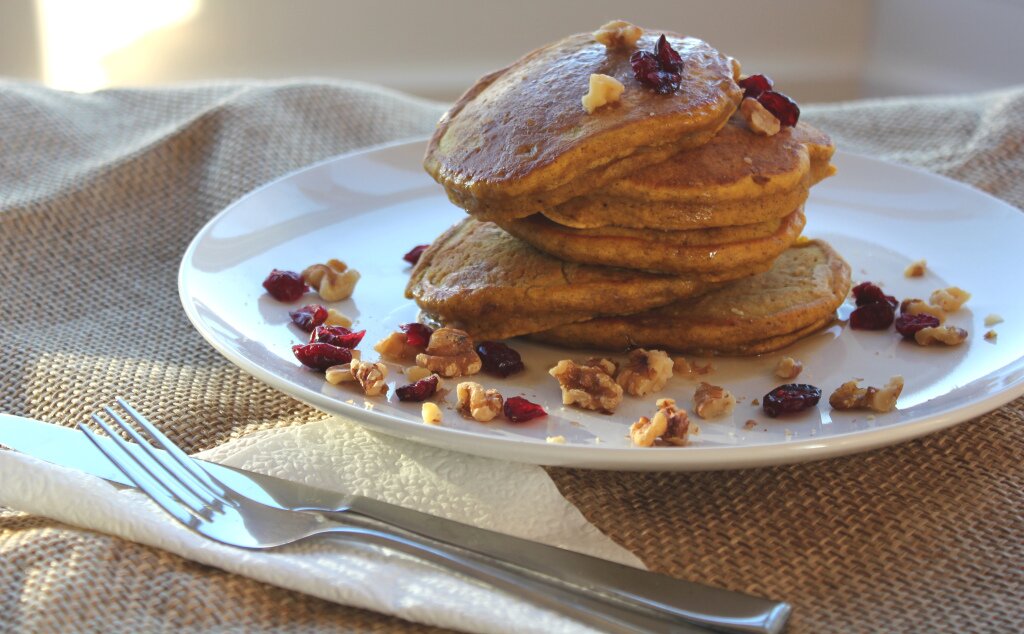
First of all, thank you all for the sweet birthday wishes!  I had a lovely day and feel pretty excited about my 26th year and all there is to come. Even though it was a work day I managed to squeeze in pancakes for breakfast, a little online shopping, and a delicious dinner with Brandon. All in all, a great day.

A birthday isn’t complete though without something sweet- so let’s talk sundaes. These sundaes actually came about last week, when I was considering different desserts for a dinner party.  I wanted something simple but still with a homemade twist.  I love the idea of serving sundaes in general, whether it’s for a birthday celebration or dinner party, it’s so fun for guests. No one’s going to complain about ice cream, but to keep it extra special I got good quality ice cream and served it with homemade toppings- caramel sauce and maple glazed pecans.  You can take it a step further and serve the whole thing in martini glasses. Unfortunately I didn’t think of doing that until after my guests left… oh well, next time!

Homemade Caramel Sundaes slightly adapted from the Barefoot Contessa at Home
Serves 6

For the caramel sauce:

  • 1 1/2 cups sugar
  • 1 1/4 cups heavy cream
  • 1/2 tsp vanilla extract
  • 1/2 tsp salt

Set a large heavy bottomed sauce pan to low heat.  Pour in the sugar and shake slightly to make sure it’s evenly distributed across the pan. Pour in the water and gently swirl the pan so it’s evenly set. You want to avoid getting particles of sugar on the side of the pan, so do not stir mixture. Cook on low without stirring for 12-15 minutes until the sugar is completely dissolved. If it takes longer, that’s fine- be sure it’s completely dissolved before moving on.

Next, raise the heat to medium and boil the mixture (uncovered) until it reaches a deep chestnut brown ( a candy thermometer will read about 350 degrees). Watch it closely at this point as you do not want the mixture to burn.  Once it reaches this color, take the pan off the heat. Stand back and slowly pour in the heavy cream and vanilla.  Careful, as it will bubble up violently! Let the mixture continue to bubble, do not stir.  Once settled, stir it gently to make sure all ingredients are combined.  The original recipe said the caramel will harden at this point.  Mine didn’t harden, but as I let is cool, it turned into a thick caramel.  If yours does harden right away, simply heat it slowly over the stove to soften.

Make the Maple Glazed Pecans: Recipe Here

Assemble the Sundaes: To serve 6, you’ll need two pints of vanilla ice cream. I’m partial to Ben and Jerry’s or Haagen Dazs.  If your caramel has cooled, pop it in the microwave for a bit to warm it up.  Fill each glass with 2 scoops of ice cream.  Top with a generous drizzle of caramel sauce and a few pecans.