Creamy Broccoli, Carrot, and Cheddar Soup

Brrr! Did it snow where you live this weekend?  New York City experienced its first snow storm, and I totally did not see it coming. Rumors began around Thursday evening, with talk of a couple inches of snow on Saturday. But temperatures were only supposed to drop to the high 30s, leaving me completely unconvinced anything was going to happen.

Boy was I wrong. On Saturday morning it quickly transitioned from rain to full on snow and sleet.  Trapped inside, we promptly spent the rest of the day rearranging our apartment and getting some more things up on the wall. I can be so impatient about the decorating process (I just want it all done now!), but things are slowly coming together. And as promised, once everything is complete, a full apartment tour is in store!

So, on to soup. You’d think this soup would have something to do with the wintery conditions we’re experiencing, but truthfully it came about well before the snow arrived.  I had a craving for Broccoli and Cheddar soup earlier this week, but wanted to create a version that was a bit heavier on the vegetables while still being indulgent.  Turns out carrots pair beautifully with the traditional ingredients, providing a sweet balance against the sharp cheddar. It’s so good, I’m truly regretting not doubling the recipe!

Hope your week is off to a wonderful start. Oh, and how could I forget- Happy Halloween! I’ll be ringing in the holiday with a pile of gummy candy tonight…. yum.

Broccoli, Carrot, and Cheddar Soup
Serves 4

  • 3 T butter
  • 1 small onion, minced
  • 1 shallot, minced
  • 1 large clove garlic, minced
  • 1 lb broccoli florets cut into a small dice (with no big pieces of stem)
  • 2 medium carrots, diced
  • 6 cups low sodium chicken broth
  • 1/2 tsp paprika
  • 1 tsp French mustard (I use Maille)
  • 2 oz cream cheese
  • 2 cups grated sharp cheddar
  • 1/2 T salt
  • 1/2 tsp freshly ground pepper

Set a dutch oven or large heavy bottomed pot to medium low heat.  Melt the better; once melted, stir in the onions and shallots.  Raise heat to just below medium, and cook for 10-12 minutes until the onions and shallots are nice and soft. Next add the garlic, cooking for 1-2 more minutes until fragrant. Lastly, add the carrots and cook for an additional 5 minutes until they’ve softened slightly.

Next add in the chicken broth, paprika, salt, and pepper, and bring to a boil.  Lower and let simmer for 5 minutes, then add in the broccoli and simmer for an additional 10-15 minutes until the carrots ad broccoli are very soft. Remove from heat. Using an immersion blender, purée the soup until it’s very smooth.  You can also purée the soup in a blender or Cuisinart and then return it to the pot. If the soup feels a bit thick, you can add more chicken broth at this ppoint.  Once puréed, turn the heat back to medium low.  Whisk in the cream cheese and mustard until well combined. Lastly, add in one cup of the grated cheddar, and stir until completely melted. Taste and season with additional salt and pepper if needed.

Serve the soup  with a drizzle of olive oil and extra cheddar on top. Can be stored up to 4 days in fridge.

New Orleans Style Shrimp

Almost two years ago, when we were still living in DC, there was an incredible snow storm.  It snowed so much, the federal government shut down for an entire week. It was the ultimate snow day!  I was living with my wonderful roommate and close friend, Lisa, at the time.  We were constantly monitoring the weather and the metro system, hoping more snow was coming or the trains would be down.  With all this time at home, we devoted our efforts to baking, cooking, and hosting cozy dinner parties. One night we had another close friend over for dinner and I cooked this shrimp dish.  It was so good, we devoured the pot in one sitting.

Ever since that night, I’ve always thought- I must make that dish again.  Well, it’s taken me a while, but I finally got around to it this past Saturday night.  It wasn’t snowing, but we were both feeling sort of under the weather and this steaming spicy pot of shrimp and vegetables felt like the perfect remedy.  It also makes for great leftovers.  If it’s rainy or chilly where you are, make this your dinner.  Enjoy!

New Orleans Style Shrimp adapted from Martha Stewart
Serves 4
Ok, so I know the original recipe includes rice in the title, and my photos even show rice, but here’s what you should really do- serve it with garlic bread.  These photos are from the day after I made it, when there was no more garlic bread so we paired it with leftover rice instead.  It’s good either way, but a homemade garlic bread (like this one) is perfect to sop up the spicy broth.

  • 4 tablespoons (1/2) salted butter
  • 3 T olive oil
  • 1 tablespoon plus 1 teaspoon all-purpose flour
  • 2 large cloves garlic, minced
  • 1 green and 1 yellow bell pepper, cut lengthwise into 1/4-inch-thick slices
  • 1 large onion, halved lengthwise and cut into 1/4-inch-thick slices
  • 2 celery stalks, cut into 1/2-inch-thick pieces
  • 1 14 oz can diced tomatoes
  • 2 c low-sodium chicken broth
  • 2 teaspoons chopped fresh flat-leaf parsley, plus more for garnish
  • 1 1/2 tsp Cajun seasoning
  • 1/2 tsp paprika
  • 1/2 tsp salt
  • 1/2 tsp hot sauce, such as Tabasco, or to taste
  • 1 pound large shrimp (21 to 30), peeled and deveined
  • 1 loaf garlic bread or 2 cups cooked rice for serving

Melt butter and olive oil in a large Dutch oven over medium heat. Add flour, and stir until light brown, 3 to 4 minutes. Add garlic, bell peppers, onion, and celery; cook, stirring occasionally, until softened, about 12-15 minutes. Add tomatoes, broth, parsley, spices, salt, and hot sauce.

Bring to a boil; reduce heat, and simmer until vegetables are soft and mixture is slightly thickened, about 30 minutes. Stir in shrimp, and cook until pink and cooked through, 3 to 4 minutes.

Pour shrimp into bowls, sprinkle with parsley. Serve over rice or with garlic bread on the side. Serve immediately or store in the fridge up to 4 days.

Kitchen Tips: Keeping it Clean

I’ll be the first one to admit I may enjoy cleaning a bit more than others (ok, probably a lot).  But all that aside, do you really feel like cooking if there’s a huge stack of dishes sitting in the sink? No. Takeout sounds a lot better. I’m not here to tell you to scrub your pots and pans more. Instead, I wanted to share a few easy things I do around my kitchen to keep it tidy without too much effort.  But more importantly, I want to hear what you guys do!  I love walking into someone else’s kitchen and discovering a little thing they do to make managing their cooking space a million times easier- so please, do share!

A Little Each Day Each night when we’re tidying up after dinner, I make a point to clean something that isn’t just the dishes.  It’s nothing major, it could be something as simple as wiping down the stove, gathering the crumbs that collect on the floor around my cutting board (does that happen to anyone else??), or spraying the sink with a little clorox. I find that by doing this, I don’t have to do that “big clean” as often, and when I do- it’s not so daunting.

Keep a Clear Fridge One time a friend that was over was grabbing something from my fridge and exclaimed, “What?! There’s not that much in here! You cook all the time, this thing should be packed!” I actually hate a super full fridge. To me it’s like a closet, I can never find anything! At the end of each week, when I’m getting groceries, I’ll first go to my fridge and clear out what’s old or not good anymore, and then use what remains to guide what meals we make that upcoming week. This process really keeps me from wasting food.

Cleaning Sponges I’d probably use a new sponge everyday if I didn’t care somewhat about the environment! I hate when they get dirty. Instead of ripping open a new every morning, each day or two, I’ll throw the sponge in when I’m running the dishwasher.  It comes out squeaky clean and feels absolutely brand new.

Line Line Line This one is a little specific, but as someone who bakes a lot (or roasts meat), I find this one really saves me a lot of scrubbing time. If I’m roasting something, I’ll always line the pan with tin foil.  That way when I go to clean up, I can just pull the tinfoil off and it’s (mostly) clean underneath.  Same for baking- I always line my pans with parchment paper. This really helps eliminate any baked on cookie remnants.

That’s all from me! What goes down in your kitchen?

Photo Credit


Homemade Oreos

Do you guys read Ashley’s blog? You know, Ashley of Not Without Salt?  One glance and you’ll be in complete awe of her incredible food photography and recipes (not to mention in love with her adorable children). But if that wasn’t enough, her writing is wonderful. Her writing is the kind of writing that leaves me feeling lighter and happier.  Her writing makes me think, “Oh, I’m not the only one that does that or feels that or agonizes over that??”

Ashley recently started a movement. A cookie movement. In moments where she feels a wave of self doubt and worry setting in, she redirects her energies towards others and bakes. The process of creating the sweet treats and providing the joy found in an unexpected cookie pulls her out of her own head and quells any negative thoughts. As someone highly prone to self doubt. As someone who can spiral into a state of despair within mere seconds (truly it’s a feat), I’m quite sure this movement was meant for me.  So yesterday morning, when my mind began spinning while I was still in bed, thinking of all the things I should do and hadn’t done and had to do, I got up and baked.  I made a homemade version of Oreos (recipe here) to share with friends. They turned out beautifully, and managed to clear my mind of anything I was fretting over just hours before.  And now, we have cookies for the week! A heartfelt thanks, Ashley.

Welcoming the Weekend

I look forward to dining out any night of the week, but there’s something about making plans for a Thursday evening that gets me super excited.  The weekend is just around the corner and it feels like the perfect night to meet up with friends and just relax. Last night we settled into a cozy table at Resto and enjoyed dinner with our friends Nick and Aliza. They’re the kind of people that make you laugh, a lot, and by the end of the night my cheeks were literally sore. It was so fun, I’m still giddy thinking about it.

Thanks for all your amazing comments this week. Have a wonderful weekend!

Photo Credit


Weeknight Simplicity: Cacio e Pepe

Oh my goodness is this good and easy!  Recipes like Cacio e Pepe make me question ever attempting complicated dishes when you have ones like this that are so simple, yet produce such a satisfying meal.

Cacio e Pepe, or cheese and pepper pasta, brings together a mere four ingredients- spaghetti, olive oil, pepper, and grated cheese- to create a creamy pasta dish.  Reading through the recipe you may be a little skeptical. Really, the olive oil and pasta water are going to mix with the cheese and pepper to make a sauce? Yes. It’s going to happen. Even when you’re cooking and it feels like it’s not going to come together- it does.

I’m so obsessed with this dish right now, I’m planing to host a dinner party and serve it as the main entrée.  That said, it takes just 30 minutes to prepare, thus making it perfect for a lazy week night meal.  Enjoy!

Cacio e Pepe slightly adapted from Saveur

Serves 4

sea salt, to taste
1 lb. thick spaghetti
4 tbsp. extra-virgin olive oil
2 tsp. freshly cracked black pepper, plus more for serving
1 3/4 cup finely grated parmesan cheese (good quality!)

Bring a large pot of salted water to a boil. Once boiling drop your pasta and cook until al dente, 8–10 minutes. Reserve 3/4 cup pasta water and drain pasta.

Meanwhile, heat oil in a large skillet over medium heat until shimmering. Add pepper and cook until fragrant, 1–2 minutes. Pour 3⁄4 cup pasta water into skillet and bring to a boil. Using tongs, transfer pasta from your colander to the skillet. Toss gently with the water and oil, coating the noodles. Then sprinkle with 1 1/2 cups grated parm and a large pinch of sea salt (or kosher salt) and toss well, swirling the pasta around the pan for 1-2 minutes until sauce is creamy and clings to pasta. Place pasta in a large serving dish, sprinkle with remaining parm and a little extra pepper.  Serve immediately.

Kitchen Appliances: Which ones are right for you?

Goodness, there must be a million kitchen appliances!  Williams Sonoma is the kiss of death for buying appliances because you walk out feeling like you need everything under the sun from panini presses to juicers.  The thing is, determining which appliances are worth your investment really depends on what kind of cook you are.  So even though I have some deep seated feelings about which ones you should and shouldn’t buy, instead I’m going to walk through the major ones and help you determine whether they’re right for your kitchen. Here goes!

Food Processors Aaaah food processors, the star of turning arduous kitchen jobs into effortless tasks.  The possibilities are endless with this machine- it creates sauces, dips, and spreads, brings together pastry dough in seconds, and of course, chops like mad.  Regardless of how or what you cook, I believe it’s worth investing in one of these machine because it makes a countless number of recipes 100 times more approachable. That said, I’ve been using the miniature one for over 5 years and have never felt the need to go for the bigger model.  This sometimes means puréeing things in batches, but this little guy is much more affordable and takes up a lot less space in my kitchen.

Stand Mixers The KitchenAid stand mixer was one of those appliances I lusted for, but truly viewed as a wedding registry type deal.  Meaning- I didn’t plan on buying one until I got married, at which point it would be the first item on my registry. Thus, you can imagine my delight when a certain someone surprised me with one for no particular reason a few years back (I actually hugged the box). I adore this machine and use it often.  That said, if you’re not an avid baker (meaning you bake multiple times a week!), you can perform most jobs with a hand mixer.  This machine is only worth the investment if you’re very sure you’ll use it frequently.

Blenders Forget regular blenders ever existed, and let’s focus on the Immersion Blender. The immersion blender is a handheld stick blender, that does everything regular blenders do- but just in an easier way. Yes it can whip up smoothies, sauces, batters, but the most amazing aspect of this tool comes into play when making soup. No more transferring boiling liquids into a blender to be puréed, the immersion blender lets you do it right in the pot. If you make soup frequently, this tool is worth its weight in gold.  Luckily, with a price tag of only $30, it’s very affordable.  Furthermore, it takes up much less space than a regular blender.  I mean, do you really need one sitting on your counter at all times? I’m doubtful…

I hope that was helpful!  I’d love to hear your thoughts- which appliances do you think are really worth the money?

Photo Credit

Eggplant Parmesan

I have to say, I don’t really love eggplant.  It’s one of those vegetables I’ve stayed away from for years after a bad experience at a Chinese restaurant.  I think it had more to do with the texture, rather than the flavor, but either way there hasn’t been an eggplant in my fridge in quite some time.  Then, last Sunday, I made dinner with a close friend- a friend who loves to cook just as much as I do.  It’s been years since our last cooking date and I was quickly reminded of how inspiring it is to get out of my own kitchen and experience how other people cook.

For our dinner we whipped together a mix of small dishes, one of which was her family’s eggplant parmesan.  I suppose if you’re going to reintroduce a vegetable into your diet, coating it in breadcrumbs and cheese is a safe way to go, but I was so blown away by this recipe- I knew I needed to try it in my own kitchen. So this past Friday, I did just that.  Though my creation is a bit heavier on the sauce, I’m confident the Heffernans would have been pleased!

Ps: This recipe is a bit long, but not complicated! So please, don’t be deterred by the length.  Enjoy!

Eggplant Parmesan inspired by the Heffernan Family
Serves 2-3 people

  • 3 small eggplants, sliced into 1/3 inch thick rounds
  • one 28 oz can crushed tomatoes
  • 1 small onion, finely chopped
  • 3 cloves garlic, minced
  • 1 large ball fresh mozzarella, thinly sliced
  • 1 c grated parmesan cheese
  • 2 eggs
  • 1 1/2 c dried bread crumbs
  • vegetable oil
  • s+p
  • pinch of sugar
  • parsley for topping

Make the sauce: Place a saucepan over medium low heat.  Coat the bottom of the pan generously with olive oil and throw in your garlic. Sauté for a minute or so until the garlic has softened, then add in the chopped onion.  Sauté the onion and garlic for 5 minutes, until the onion has softened slightly.  Pour in the crushed tomatoes, add a pinch of sugar, a large pinch of salt, and several grinds fresh black pepper.  Let sauce simmer while you prepare the eggplant. (Taste sauce for seasoning before using in dish).

Prepare the Eggplant: Place the rounds on a cutting board and sprinkle liberally with salt.  Let rest.  Meanwhile take two shallow bowls, beat the eggs in one bowl, and combine the breadcrumbs, 1/2 cup grated parm, a pinch salt, and several grinds black pepper in the second bowl. Set aside.

At this point, preheat your oven to 350 degrees.  Once eggplant has sat for 15 minutes, lightly rinse the salt off of each round and pat dry. Then, take each round and coat in egg and then breadcrumbs. Once each one is coated, take a large sauté pan and coat the bottom very liberally with vegetable oil. Set over medium heat, warming oil until it sizzles slightly if a drop of water hits the pan.  Fry the eggplant in batches, cooking rounds for 4-5 minutes on each side until golden brown.  Add more oil to the pan as you go through the batches so it doesn’t dry out.

Assemble the dish:  Take a large baking dish, and place the largest rounds in two rows in the bottom of the dish.  For each eggplant parm “stack” you’ll need two slices of eggplant, so depending on the number of rounds you have, assemble accordingly. On top of the first round place a spoonful of sauce, then a slice of mozzarella, then another piece of eggplant, another spoonful of sauce, and lastly, top with another slice of cheese. Repeat the same process for all the eggplant.  Place the remaining sauce around the eggplant stacks, and top with the remaining half cup of grated parm.

Bake for 30 minutes at 350 degrees, and then place under the broiler for the last 5 minutes of cooking. Top with chopped parsley. Let cool and serve immediately.  Can be stored in fridge for up to 4 days.

Chocolate Chip Pumpkin Bread

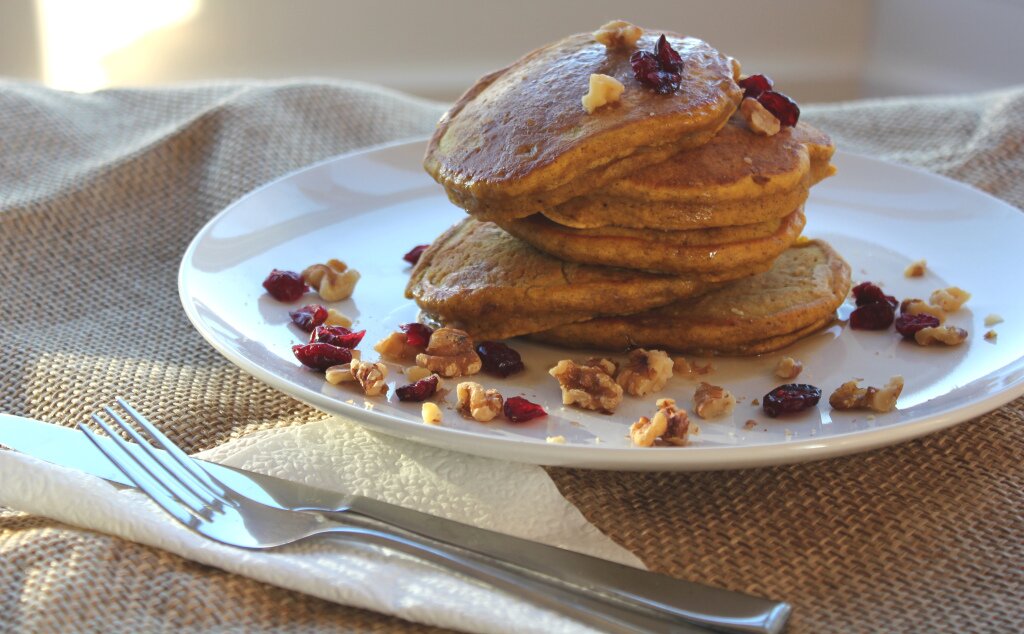
I know what you’re thinking. “More pumpkin, really?”  But here’s the thing, you can make this bread, and these pancakes, and you’ll make exact use of one can of pumpkin puree. No leftovers!  Isn’t that exciting? I was a little excited.

I had initially set out to make muffins, but discovered last night that my mini muffin tin does not actually fit inside my oven. To the person who thought it was trendy and cool to put tiny sleek ovens in new apartments- you clearly don’t bake! Ok rant done. Sort of. I’m still fuming a bit.  The funny thing is, when I was viewing apartments, friends of mine in the neighborhood mentioned to be weary of the ovens in new buildings.  They had viewed an apartment and actually decided not to live there because the oven was so ridiculously tiny.  Seriously, the things you have to consider…

I suppose we’ll make due with just regular sized muffins for a while.  Ironically enough, that pan actually fits in the oven! Ok, enough of this. Have yourself a fabulous weekend!

Chocolate Chip Pumpkin Bread adapted from Simply Recipes

Makes 1 loaf

  • 1 1/2 c flour
  • 1/2 tsp of salt
  • 2/3 c sugar
  • 1 tsp baking soda
  • 3/4 c pumpkin purée
  • 1/2 cup vegetable oil
  • 2 eggs, beaten
  • 1/4 cup milk
  • 1/2 tsp nutmeg
  • 1/2 tsp cinnamon
  • 1/2 tsp allspice
  • 2/3 c chocolate chips
Preheat your oven to 350 degrees.  Butter a 9x5x3 loaf pan and set aside.
In a bowl mix together the eggs, pumpkin, milk, oil, and spices.  In a separate bowl sift together the flour, sugar, salt, and baking soda. Pour the dry ingredients into the wet and stir until just combined (do not over mix).  Fold in chocolate chips.
Pour batter into buttered loaf pan and bake for 50-55 minutes until a toothpick or cake tester comes out clean. Let cool and enjoy immediately, or store wrapped in plastic wrap on the counter for up to 4 days.

Knives: Which ones should you buy?

Happy Wednesday! A week back I introduced a little series on the blog focused on how to construct a fabulous yet well functioning kitchen (without spending a bundle).  Last week I covered my top ten pantry items to keep on hand at all times. This week, we’re discussing knives!

I tend to be a quality over quantity person in most aspects of my life, but when it comes to which knives I own, this mantra really rings true. Despite what they tell you (and try to sell you), you don’t need a lot of knives to make a great kitchen. Really!  At most you need two to three, and really, you can get away with just one- if that fits your cooking style. Rest assured this is not just me telling you this, I’ve taken knife skills and various other cooking classes where they’ve emphasized the same thing- less is more! So please, do not purchase a butcher block.  In my mind, they just waste counter space.

Here are the knives I think are worth investing in, and some tips to help determine which ones fit best in your kitchen:

A Good Chef’s Knife This is the one everyone should have, and many would argue that one doesn’t really need any other knives other than this one.  The key is to make sure you invest in a good one (which doesn’t mean spending a fortune), and keep it sharpened.  These two are excellent choices- 1 & 2, and I keep this sharpener on hand to keep my knives in top condition.

Bread Knife I find that unless your chef’s knife is super sharp, it can be tough cutting bread.  Therefore, a bread knife can come in handy.  As someone who buys a lot of bread that isn’t pre-sliced, I use mine all the time.  If you feel you need one, these are good choices: 1 & 2.

Paring Knife If you’re an avid cook, a paring knife can be quite handy in managing smaller chopping jobs.  But it is by no means necessary!  Of all the knives listed here, I’d say this one is most dispensable. It really depends on how and what you cook.  We eat a lot of cheese, and I actually tend to use mine most frequently for that.  If you do need one, this is a great choice, and this chef and paring knife set is a wonderful option too (I bought this for Brandon).

Ps: Last tip- never put good knives in the dishwasher!  It dulls the blade, can lead them to rust, and is also damaging to the handle. Yes it may take more time to wash them by hand, but it keeps you from having to sharpen them as often.

Photo Credit